Create catalogue items
This section describes how you can use the ELG platform to create new items which will be published at the ELG catalogue.
The current release of ELG offers two options for registering a catalogue item:
the ELG interactive editor (see Use the interactive editor)
the upload of a metadata file that conforms to the ELG schema (see Create and upload metadata files).
Both options are available through the Provider’s grid. To access it, you must sign in with an account that has the provider role. If you don’t have such an account, see how you can register and become a provider.
Use the interactive editor
To access the editor form, sign in to ELG, and go to your grid and click on Create items.
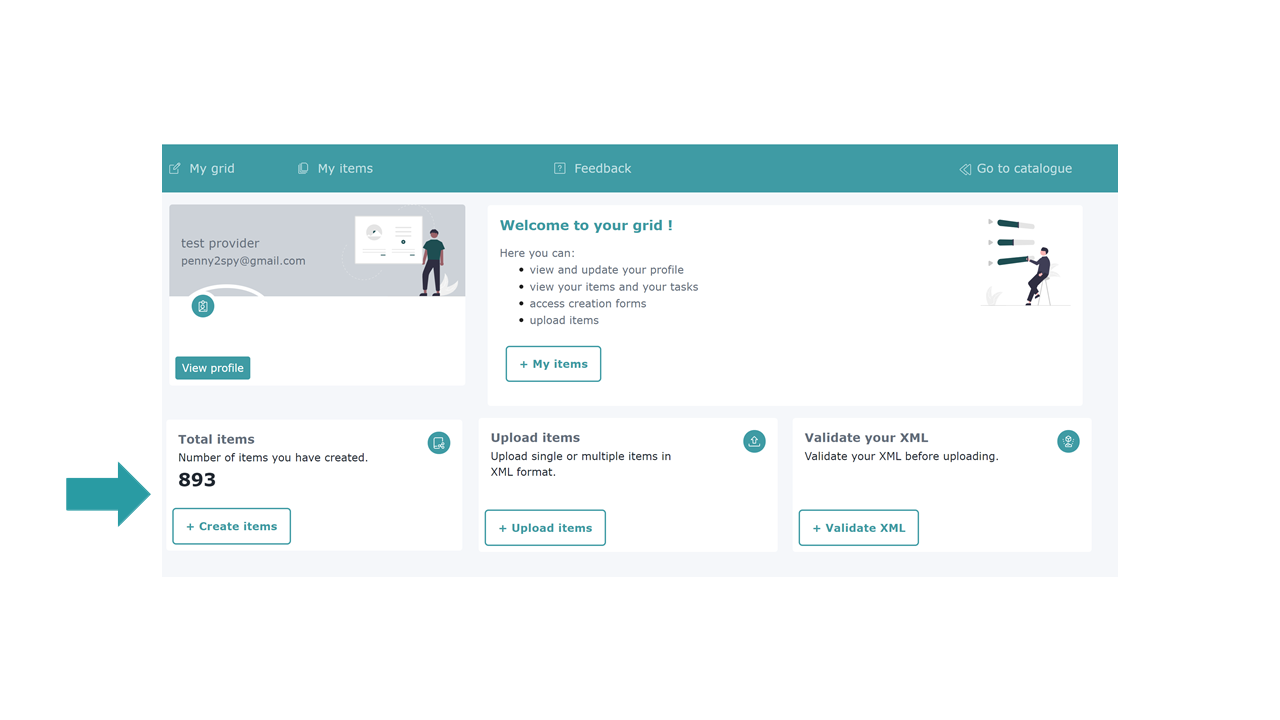
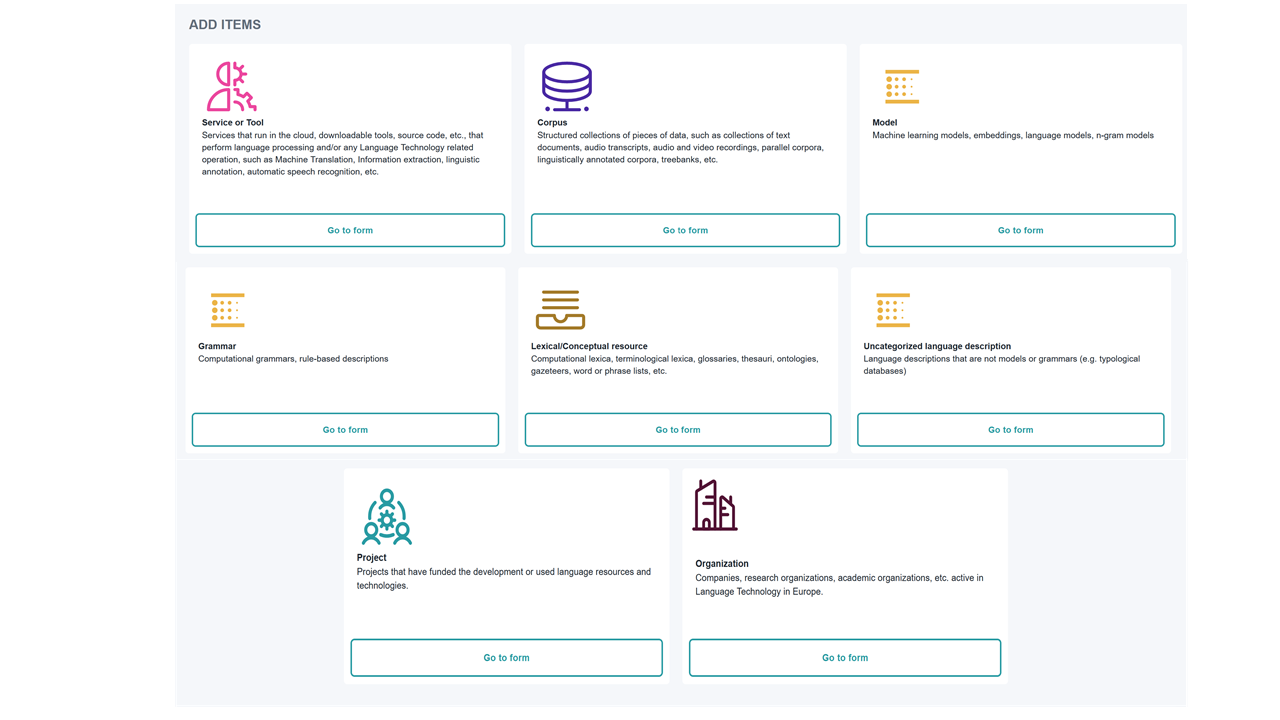
On the item type selection page, click on Go to form for the type of item you wish to create.
Step 1: Search if the item is already included at ELG
The first step is to check whether the item you want to create is already included at the ELG platform. In order to avoid confusion, the system does not allow reusing the same name for multiple items 1. If this is the case, you are presented with a list of items that match your proposed name (wholly or partly). You can select to edit one of the resources in the list, provided you have the rights to do so. Otherwise, if you want to create a new record, you have to use another name.
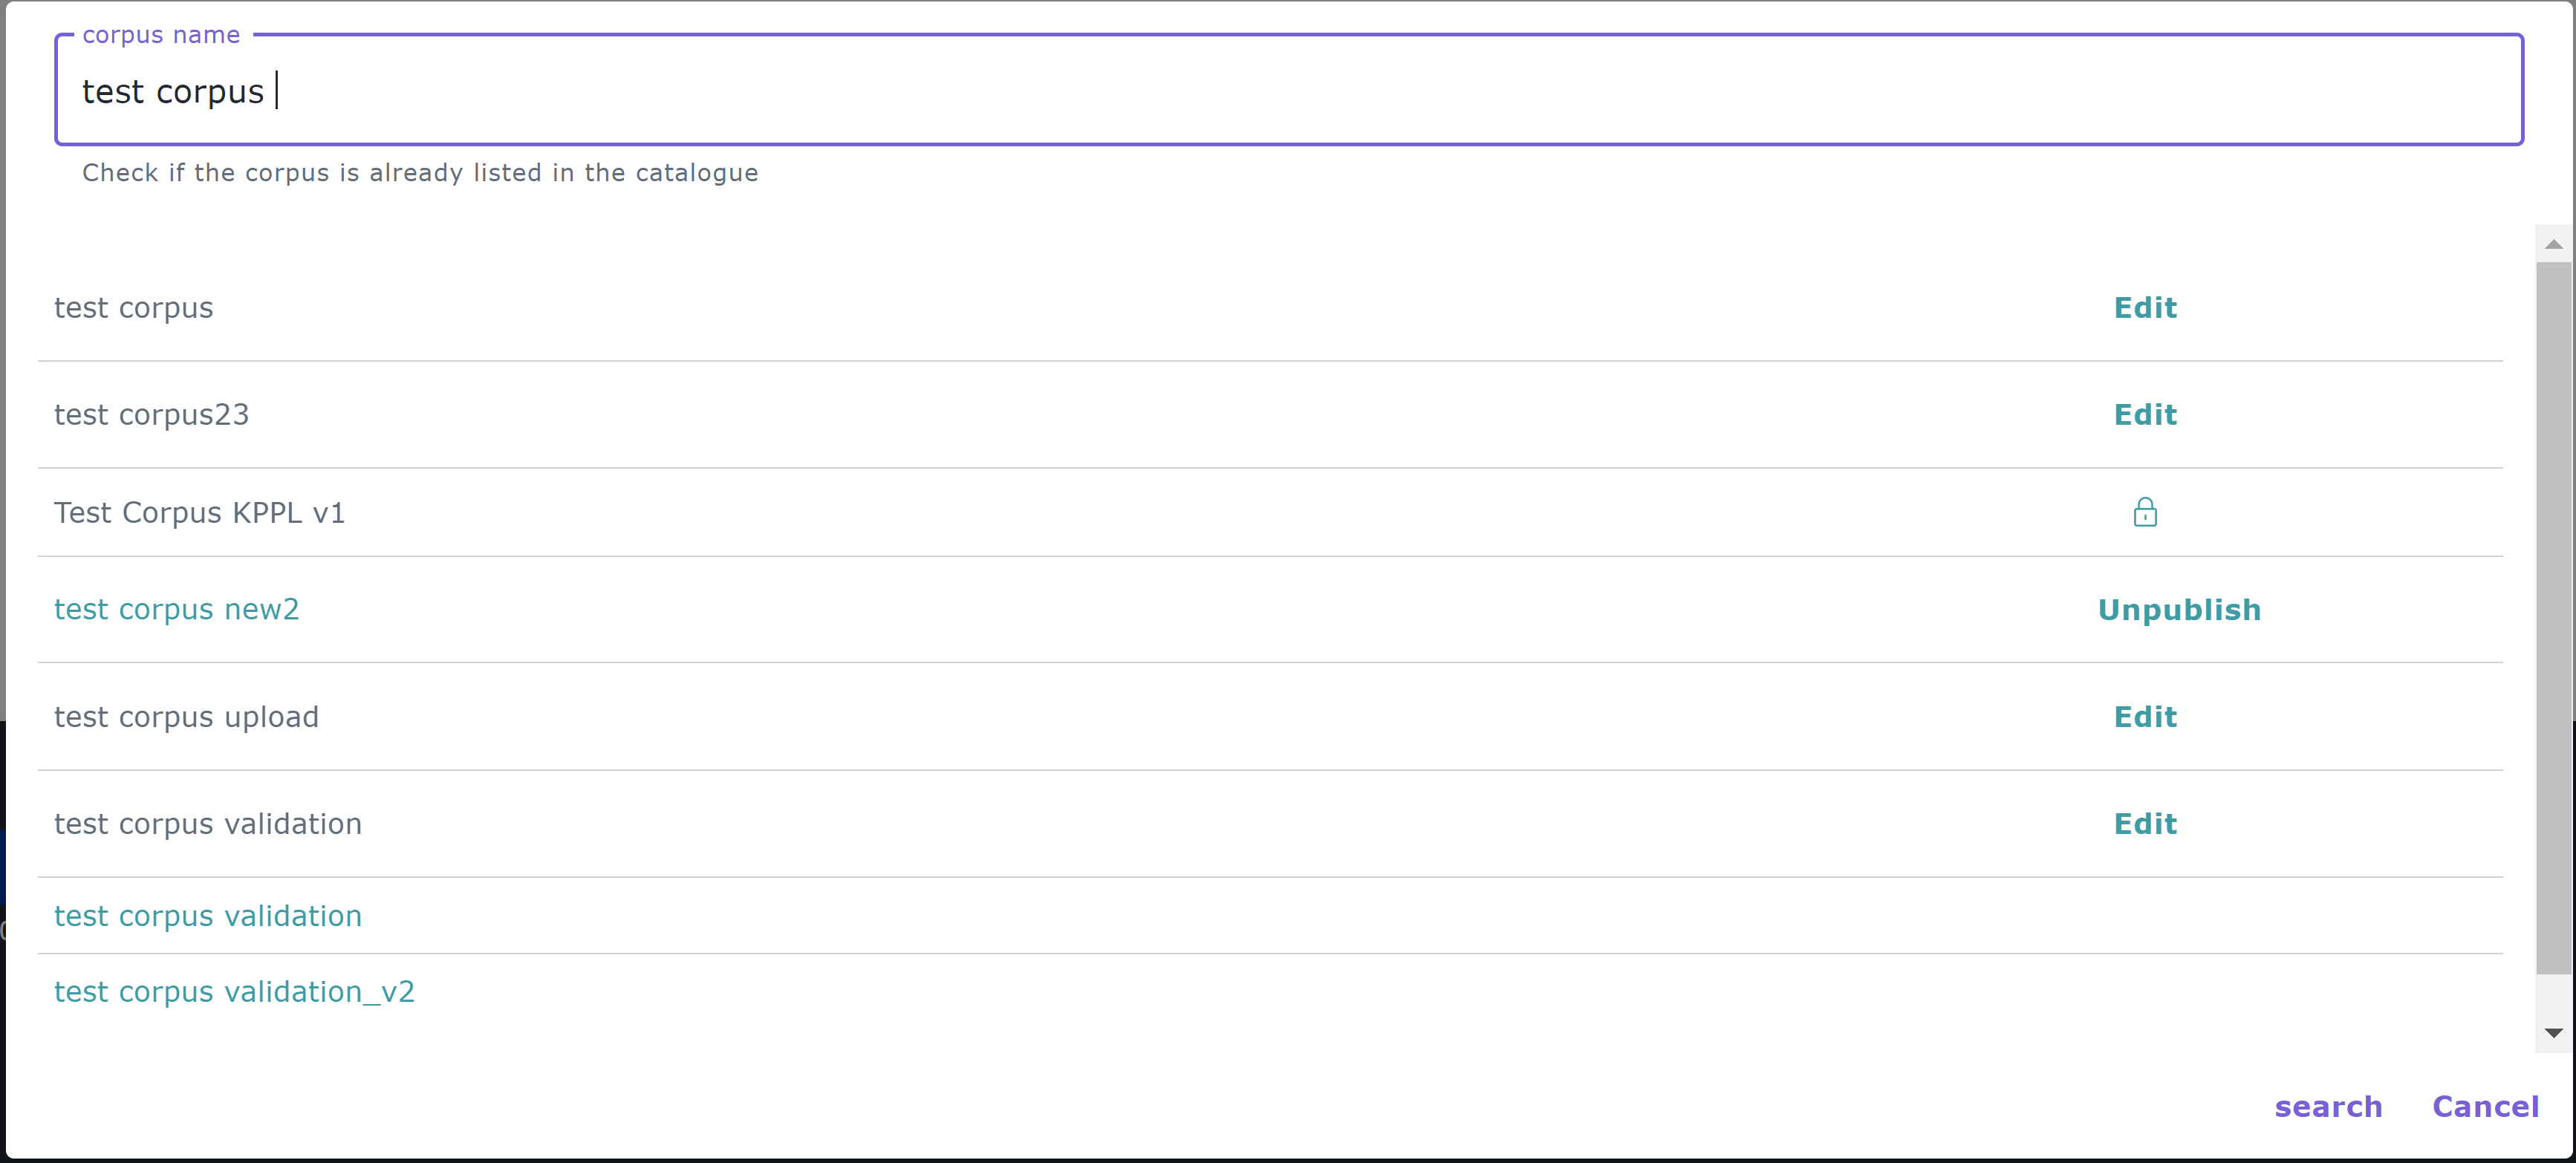
If the name is not found, you can proceed to the next phase by clicking on create.

Note
After a name has been checked for tools/services, you will be presented with a different screen asking you whether you would like it to be integrated in ELG as an ELG-compatible service (i.e., available through the ELG APIs). For more information, see Contribute an ELG compatible service.
Step 2: Upload the resource data
Note
This step is not relevant to projects and organizations and therefore is omitted. The step is also omitted for tools/services but you have the chance to upload content files for them (e.g. source code or an executable file) through the editor at a later stage.
The content files must be compressed in .zip, .tar, or .gz format 2 .
When you click on create, a new window appears asking you to upload your data.
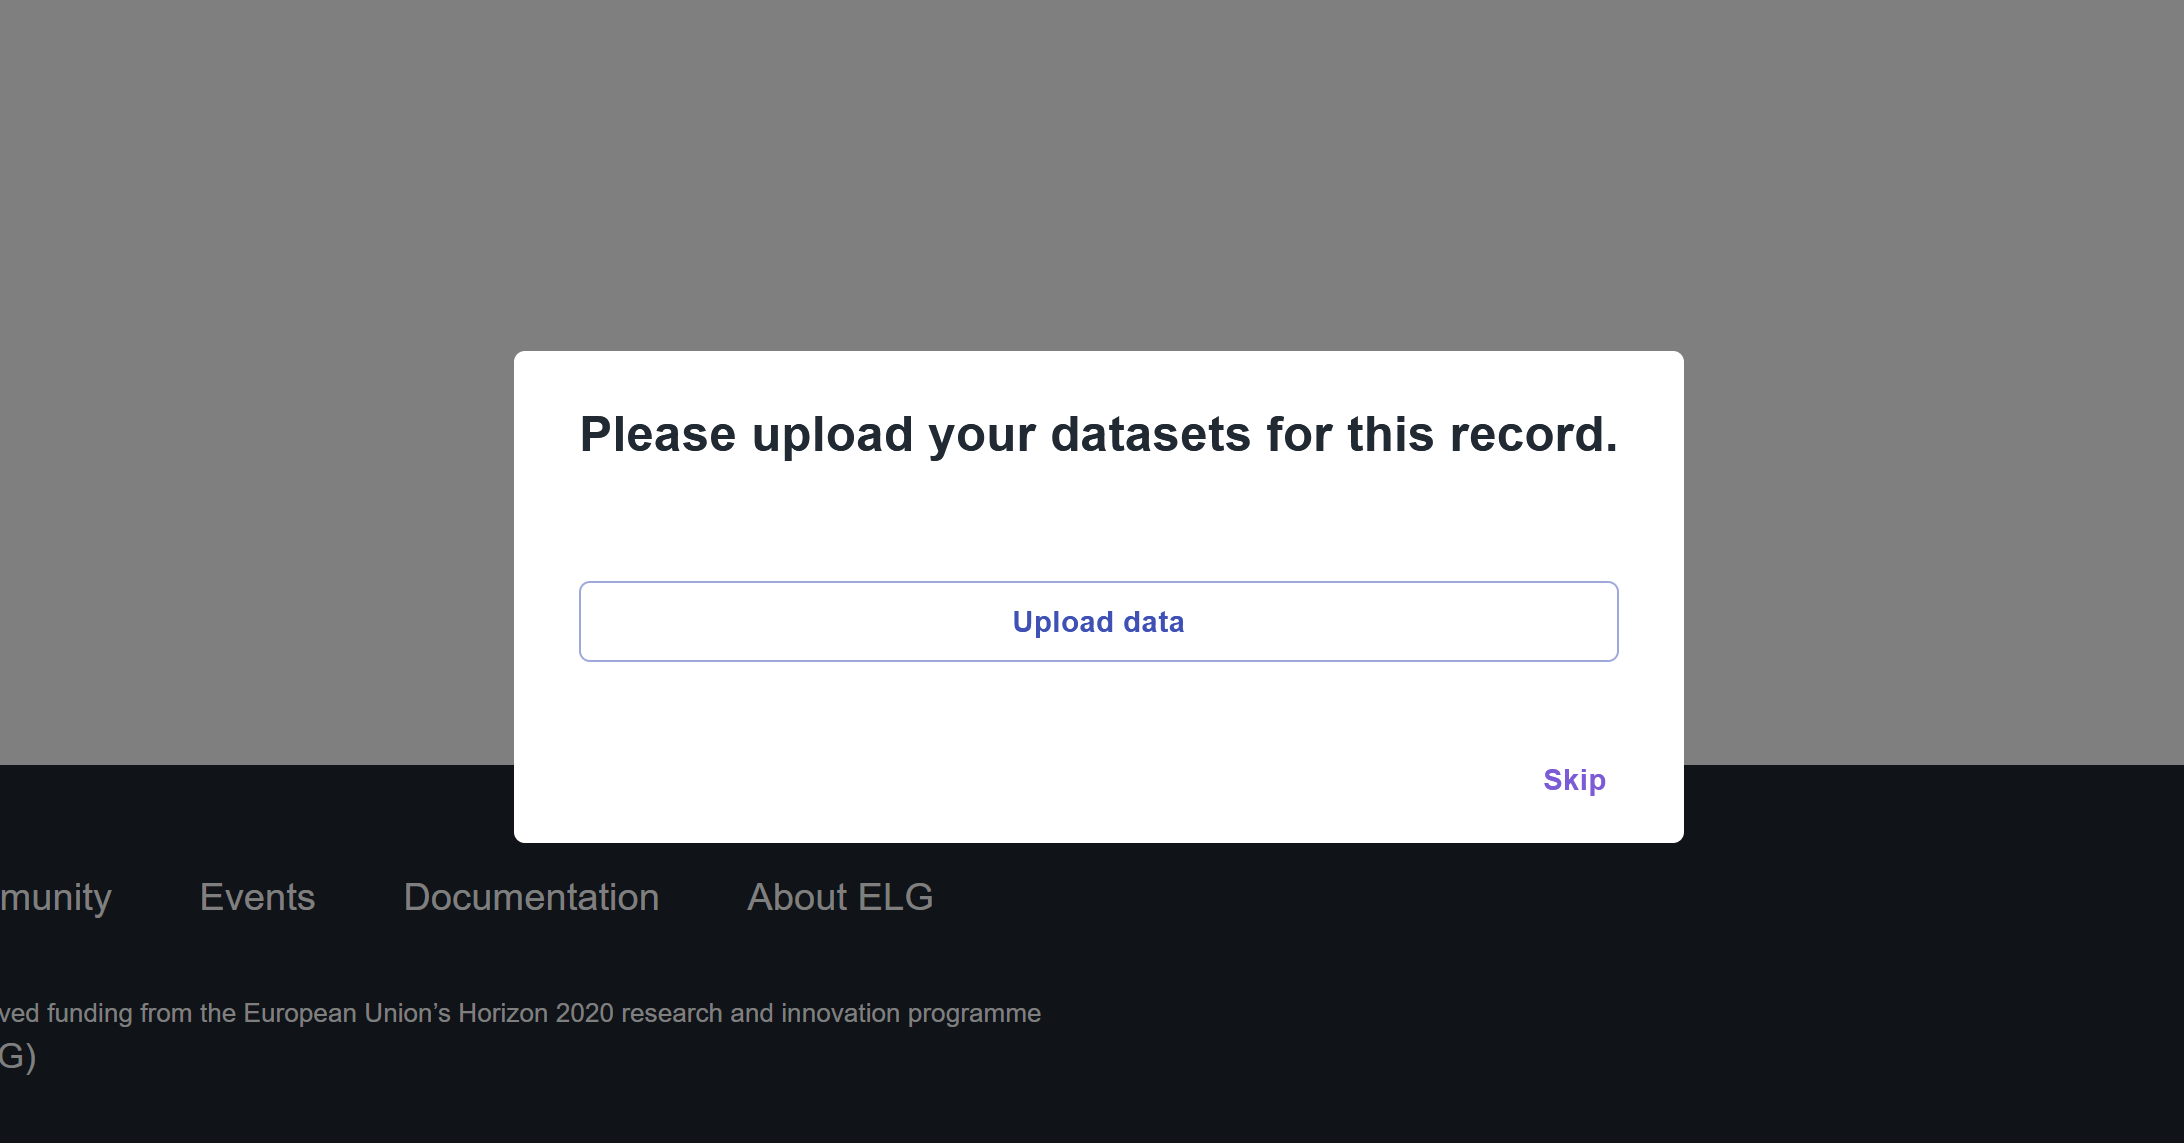
You can upload the content files at this step or skip it and upload your data later.
If you decide to upload your content files at a later time, simply visit the editor and select the Data section where the upload button is found.
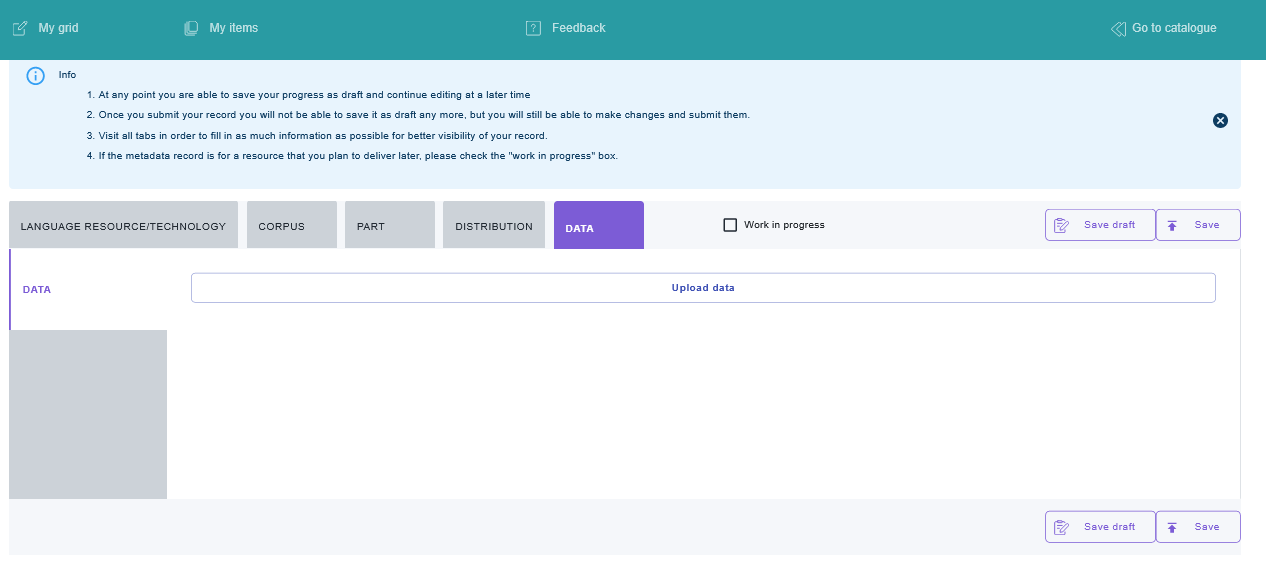
More information on the process for uploading and managing content files is provided here.
Step 3: Fill in the mandatory metadata
Whichever type of item you choose, you have to provide information on some mandatory metadata elements (different per item type) which are distributed in several sections (organized horizontally) and various tabs (presented vertically) in the editor. You will find an overview of the mandatory elements as displayed on the editor form for each item type at the respective page for each of them.
Note
On the top of the editor, there is a box work in progress. This is reserved for ELG compatible services or resources that will be hosted at ELG and are in the process of being created by the providers. For such cases, some of the information is not yet known (e.g. size of the resource, licence). If you tick the work in progress box, when the item is published on the ELG catalogue, the Download tab will not be visible. When the resource is ready, please contact us and we will return the record to the editing status, so that you can proceed with the final submission.
During the creation process you can stop any time and save your record as draft 3. You will not be able to save your record unless you have filled in all the mandatory metadata. Every time you click on save, the metadata you have entered are checked; each time mandatory metadata are missing or have false values, you will get a message prompting you to correct your errors.
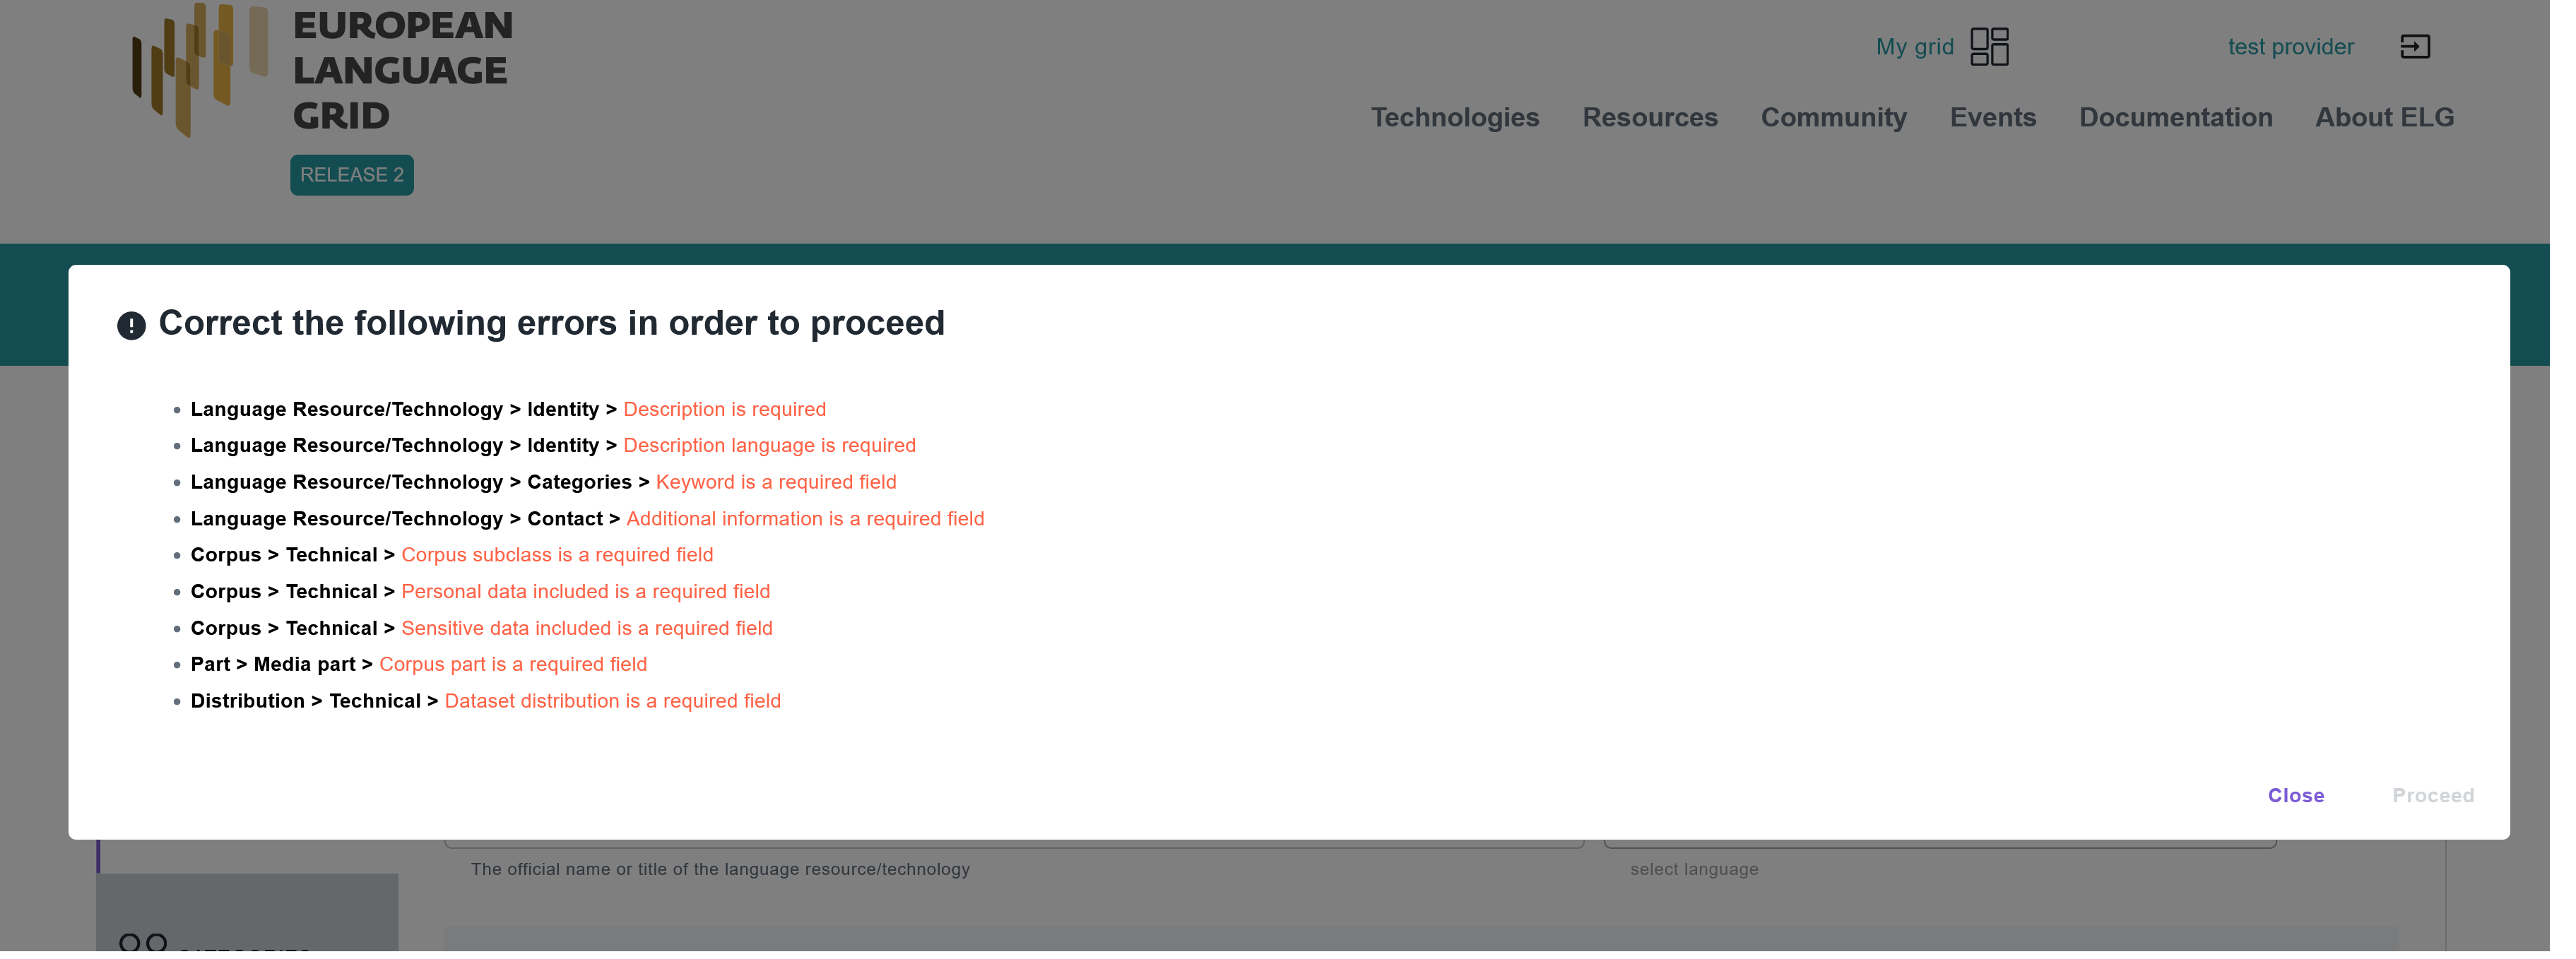
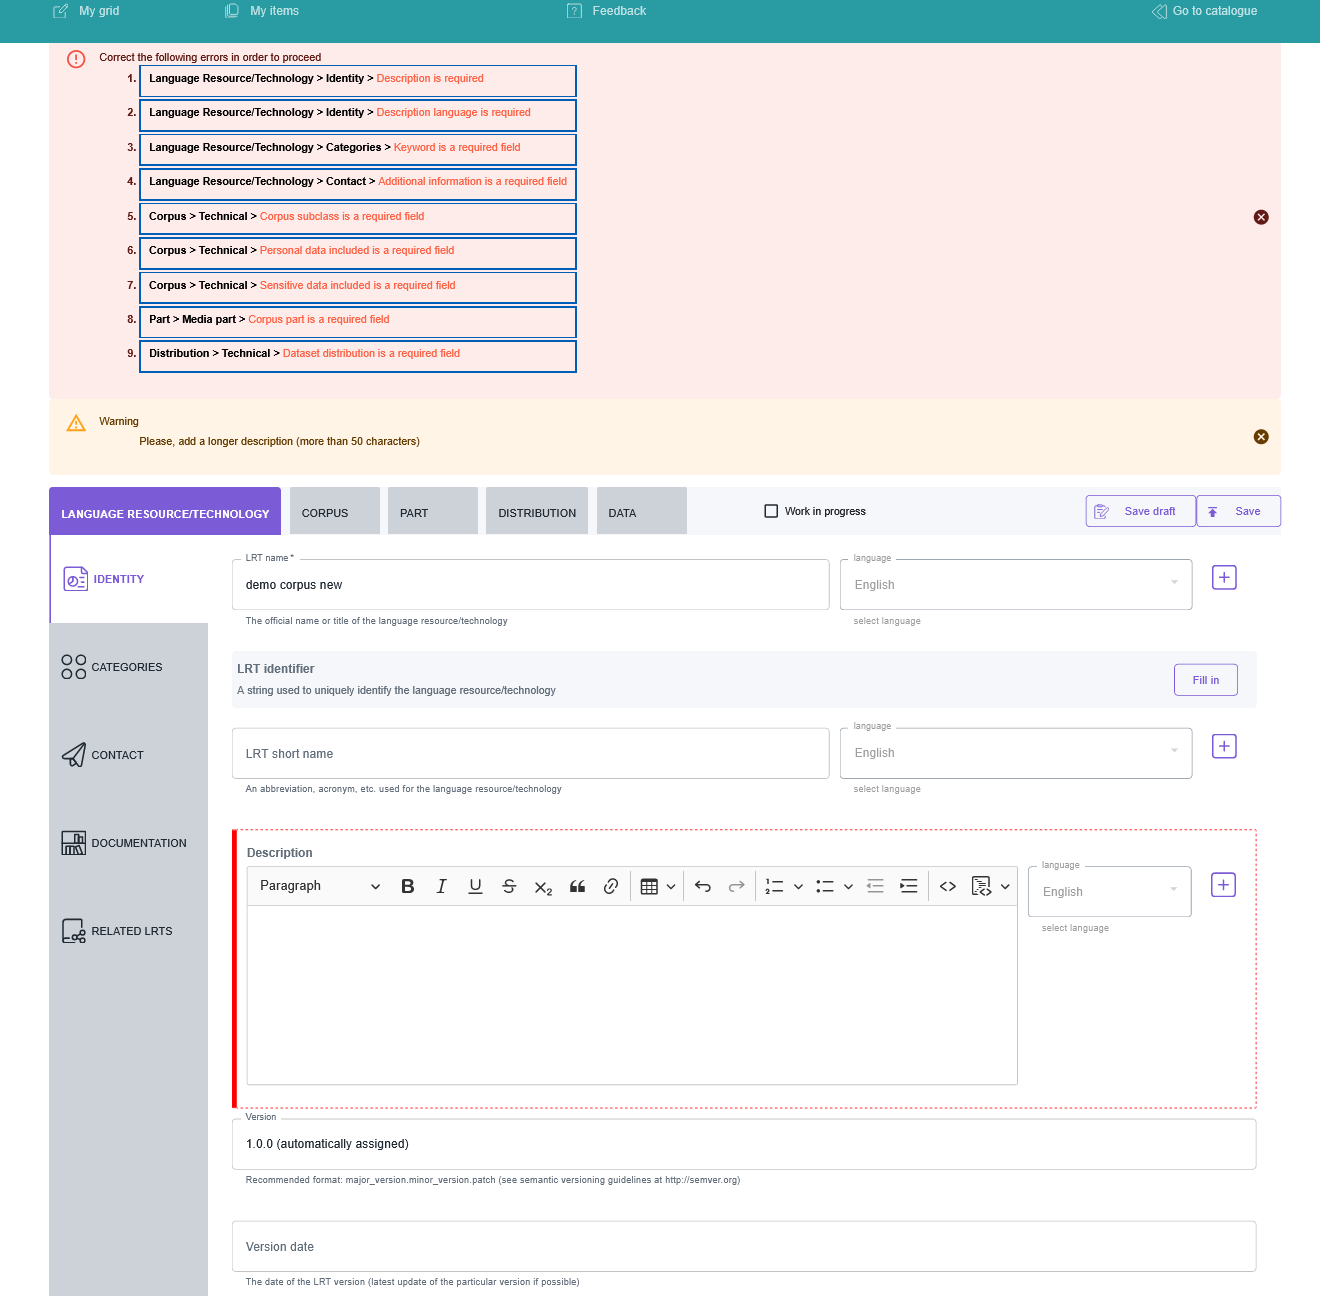
After closing this message a new highlighted area appears above the sections. It contains the path (section > tab) to each one of the missing/incorrect metadata. When you click on it, you are automatically transferred to the respective section tab where the missing metadata are highlighted with a vertical red line.
Upon checking whether you can save this record after filling in the required metadata, you might be informed again with a message that more metadata are needed. This happens because some of the values you have entered have generated new requirements (these are the mandatory if applicable metadata). Again, the new metadata you must fill in appear at the top of the editor page.
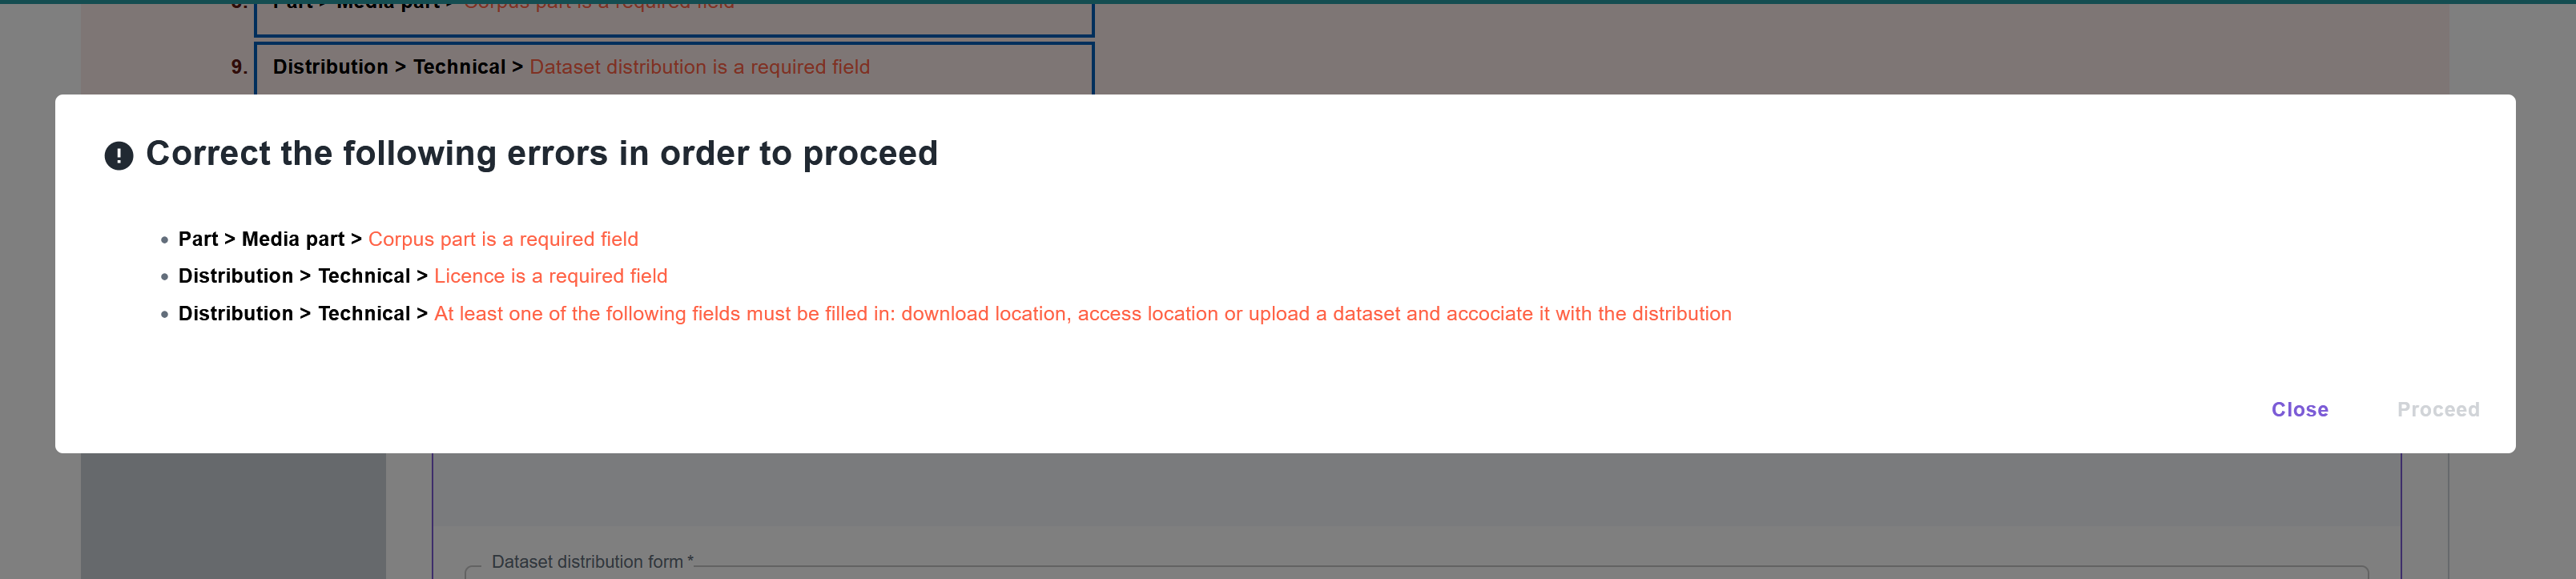
This message might appear several times before all the necessary metadata have been filled in. After the process has been completed, you will be finally allowed to save the metadata record.
Tip
The editor includes also the recommended metadata elements. Although you can save a record with only the mandatory ones, you are advised to add these also, as they increase the visibility and usability of your resource.
Step 4: View the created record
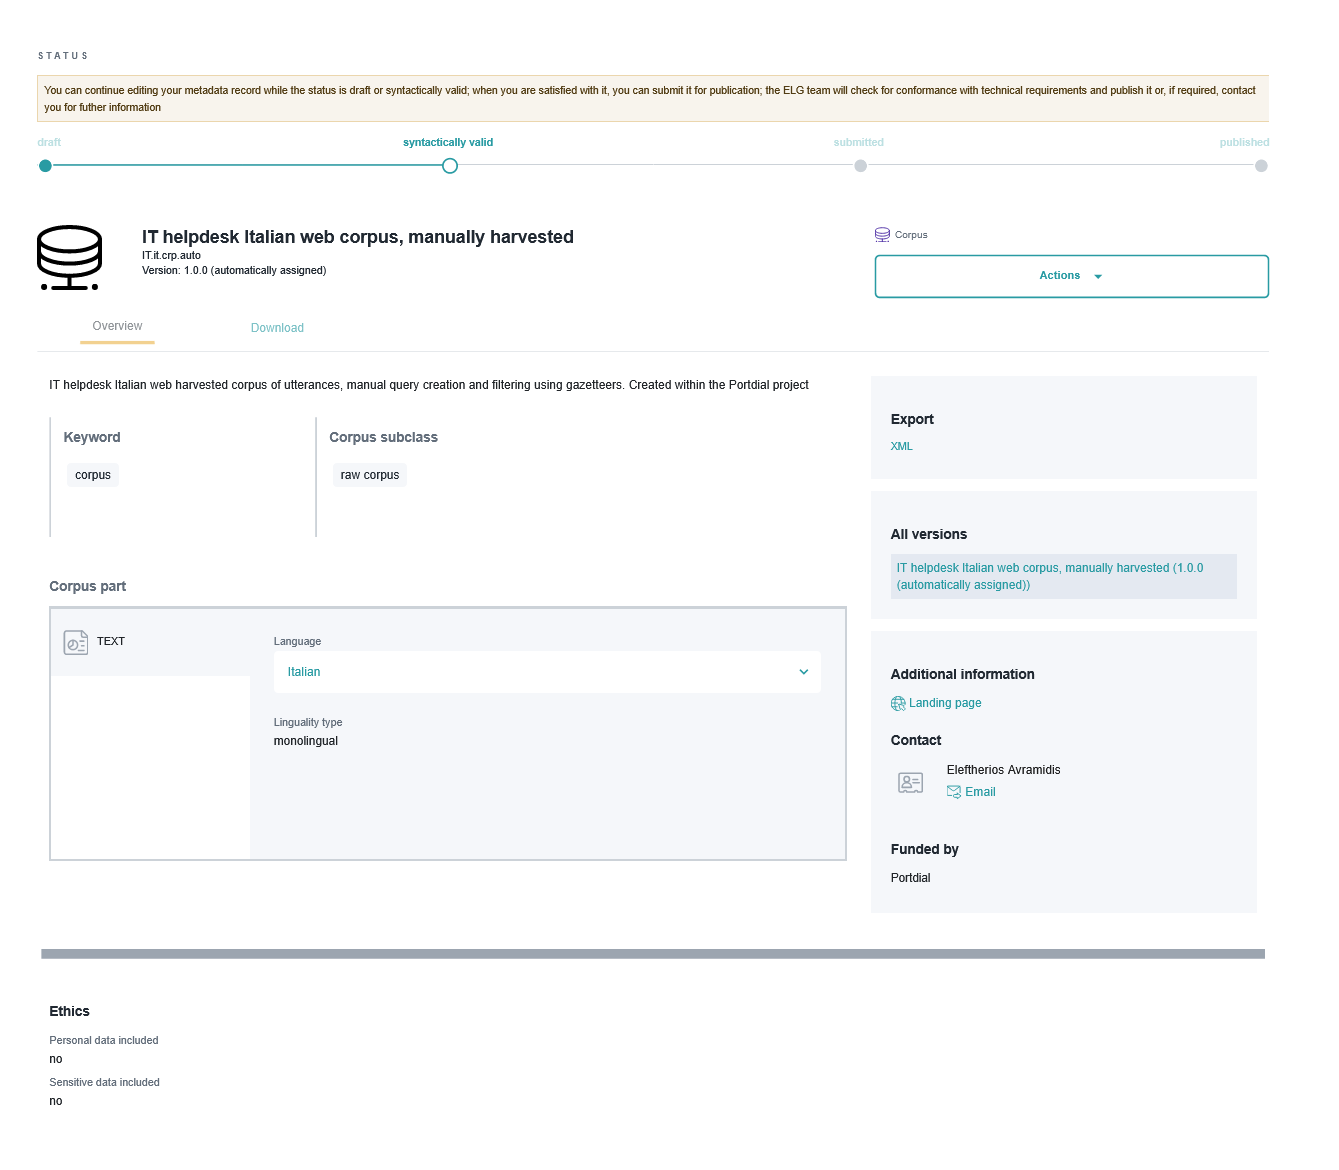
After you click on proceed, you get a message that the metadata record has been successfully created and you are transferred to the view page.
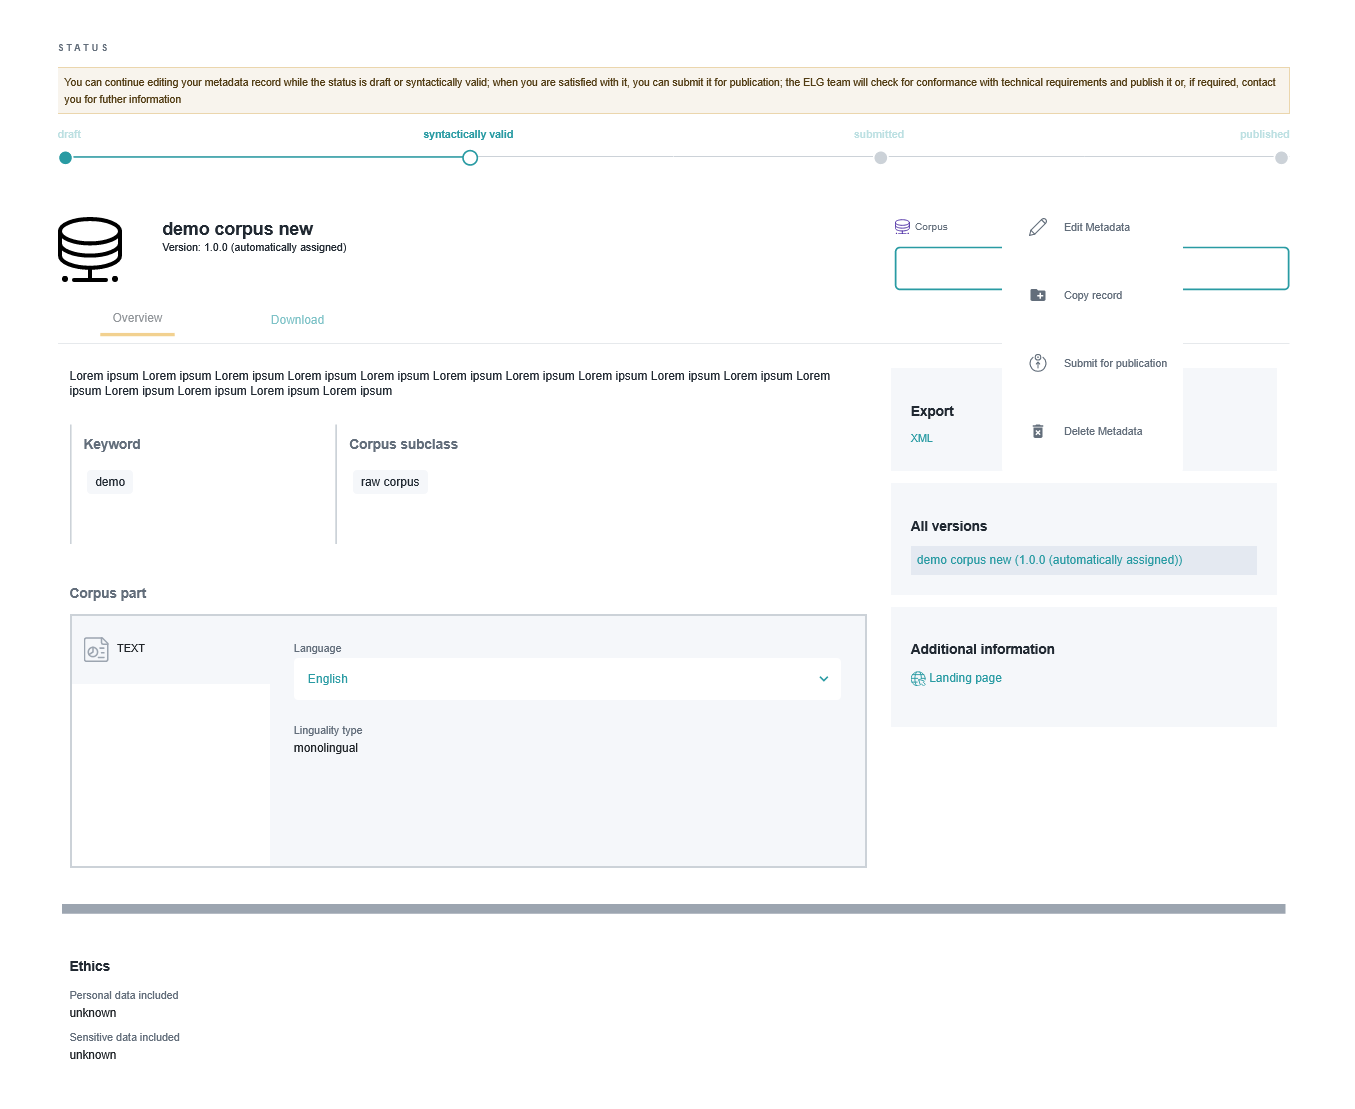
The view page is similar to that on the ELG catalogue, with two additions:
at the top side there is a bar with information on the status of the metadata record, and
an additional menu on the right for the Actions you can perform. Through the Actions menu, you can select to go back to editing mode, submit it for publication or delete the metadata, depending on the status of the record (see Manage your items for more information).
Create and upload metadata files
For this release, the metadata files MUST be in XML format compliant with the ELG-SHARE schema.
Note
The metadata files that you upload to ELG MUST be syntactically valid; i.e, they MUST contain all mandatory elements of the ELG schema.
Step 1: Create a metadata file
If you wish to create metadata files compliant with the ELG schema, you will find at the ELG GitLab templates (that you can use to create new metadata records) and examples.
Step 2: Validate the metadata file(s) against the ELG XSD
You can validate the metadata file(s) you create against the ELG schema XSD, using the ELG validator, which is accessible in two modes:
publicly available at https://live.european-language-grid.eu/catalogue/validate-xml, for interested users without signing in at ELG;
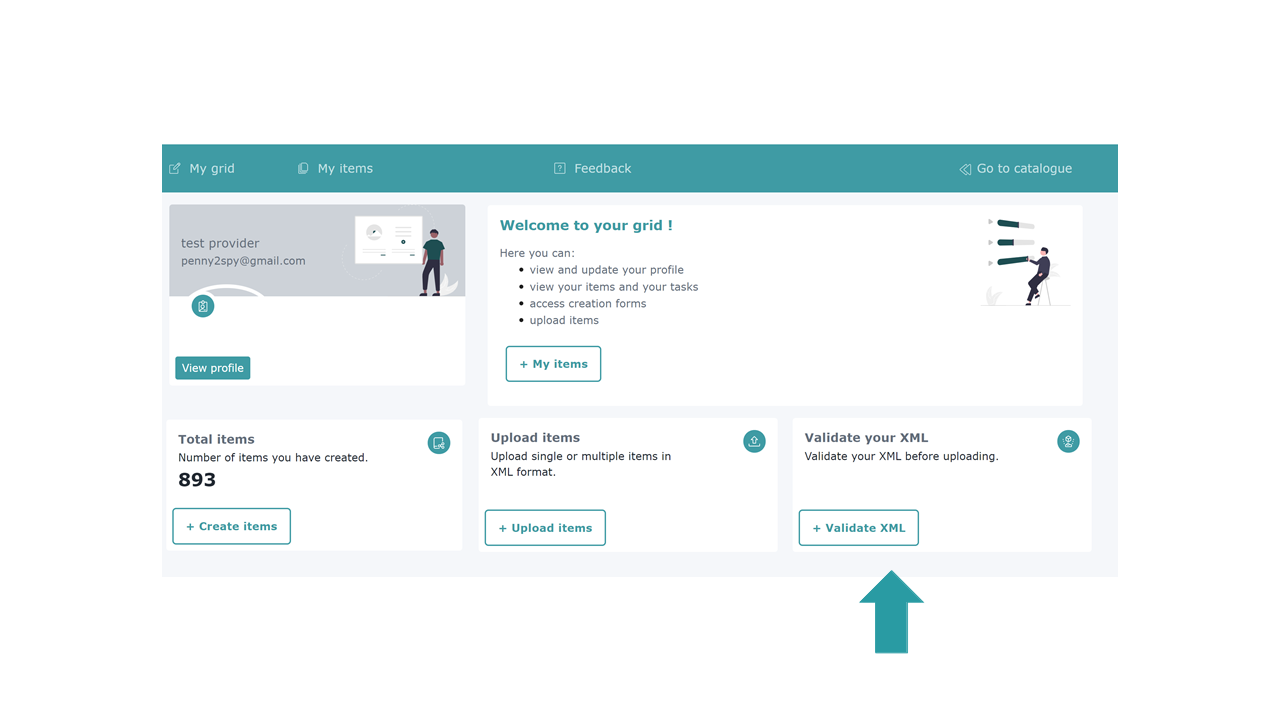
through the grid, by clicking on My grid and selecting the validate XML button.
The ELG validator can be used for validating single XML files or zipped archives 4 .
Step 3: Upload the metadata file(s)
Click on My grid and click on Upload items.
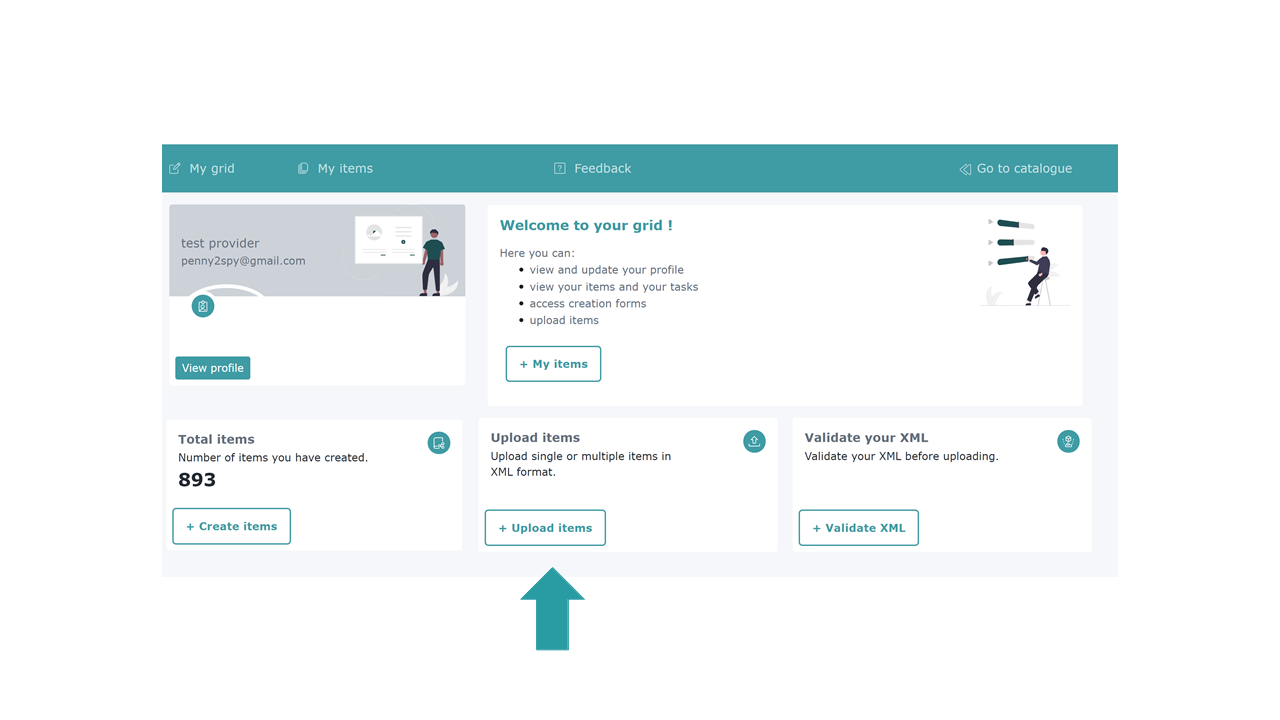
You can select to upload a single item or multiple items.
Upload a single file
Now upload the file you created.
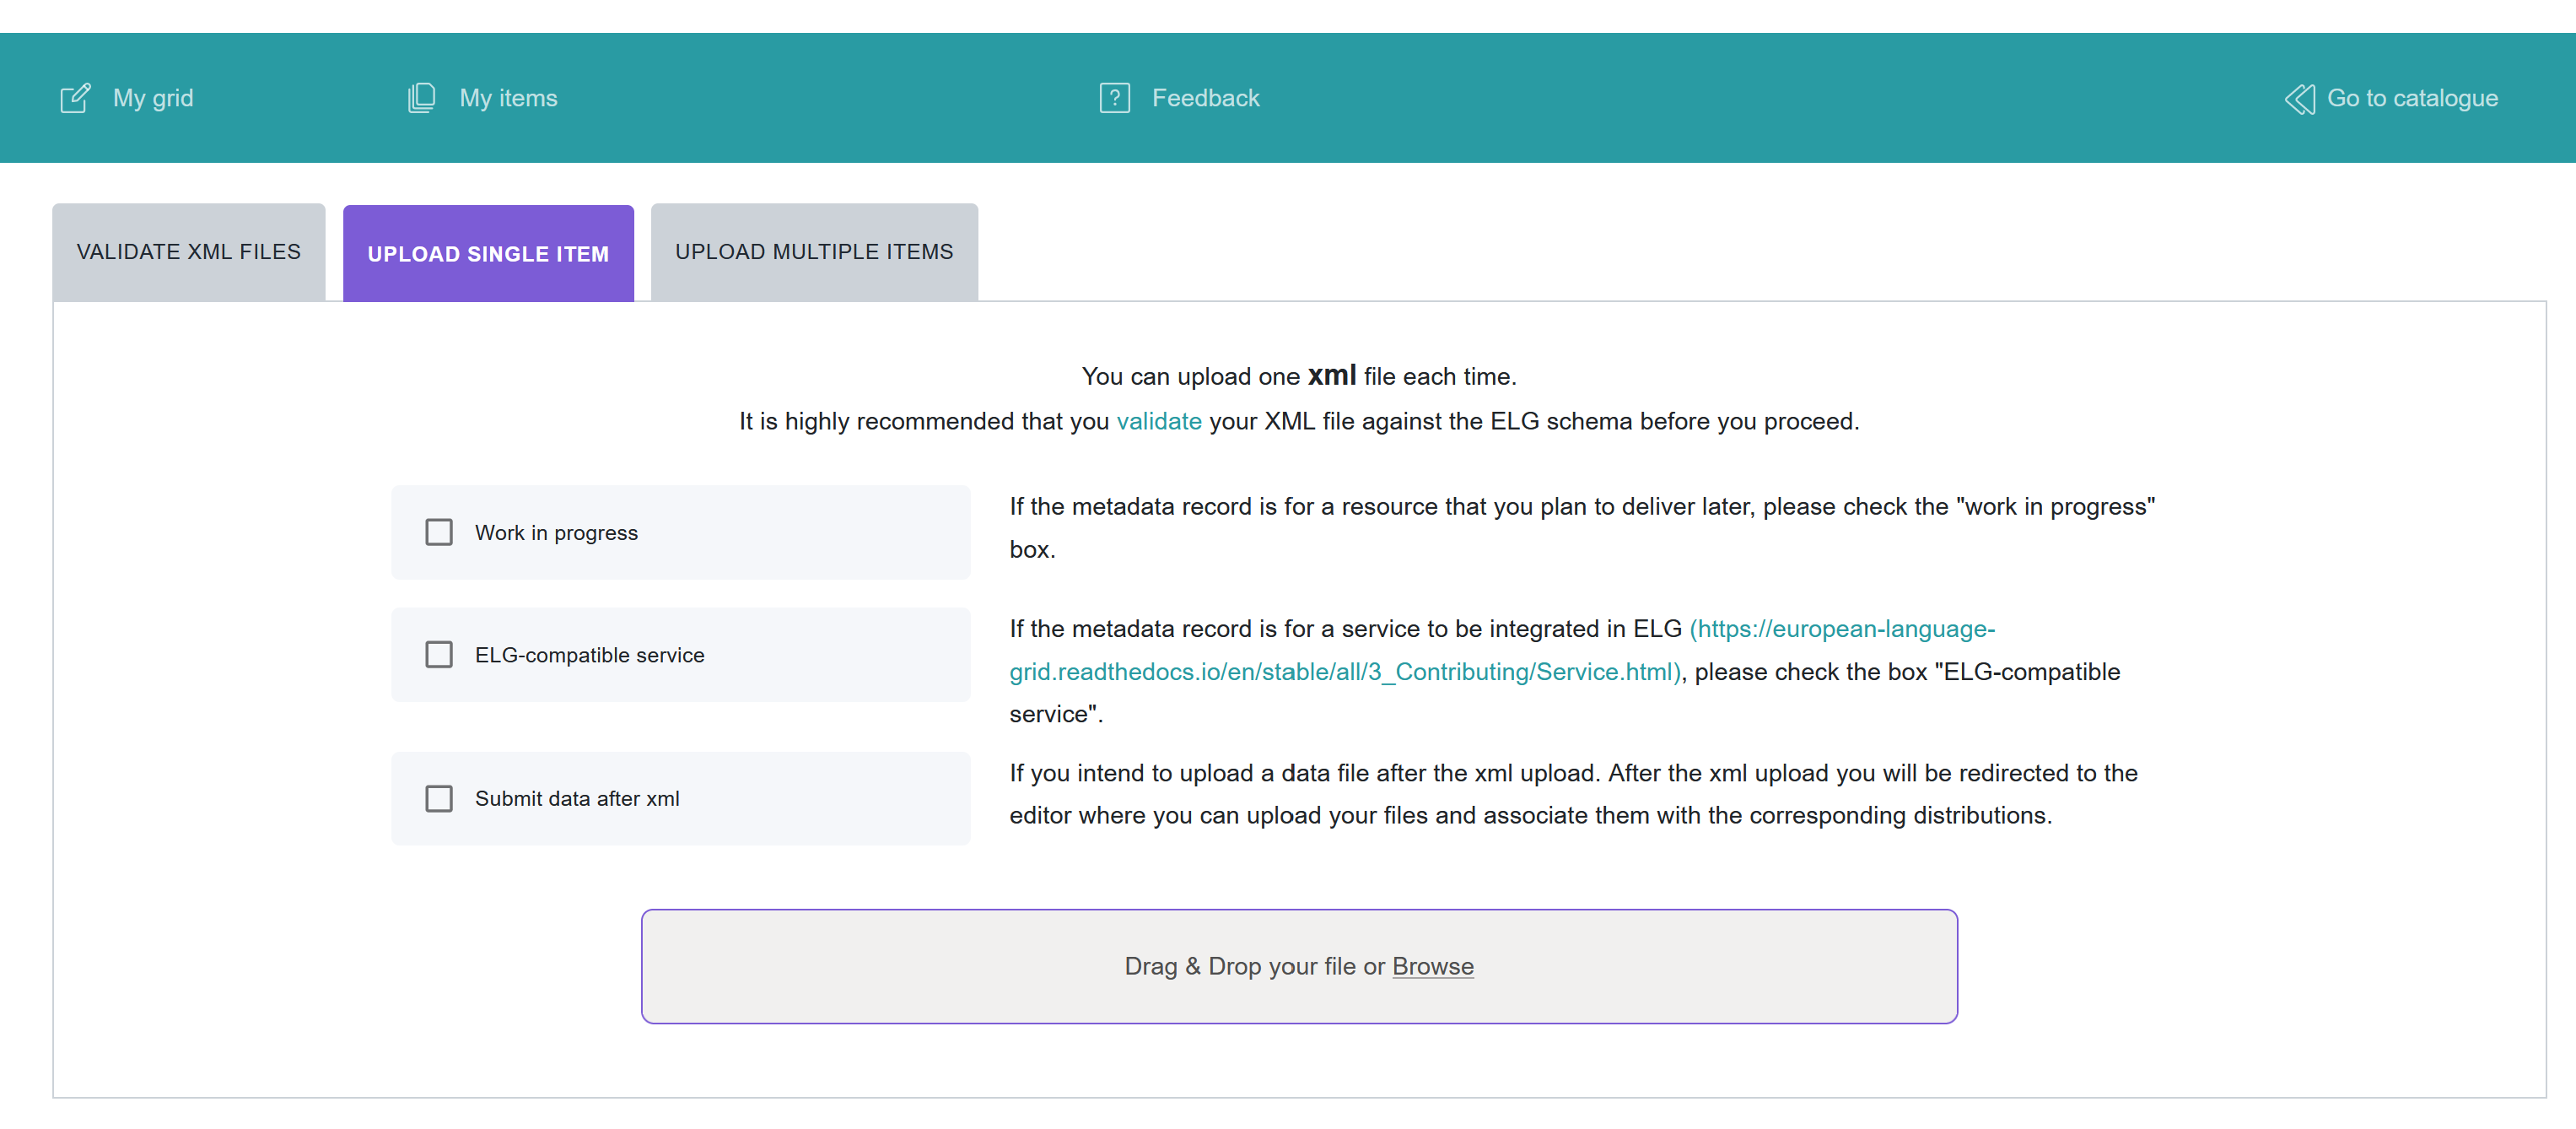
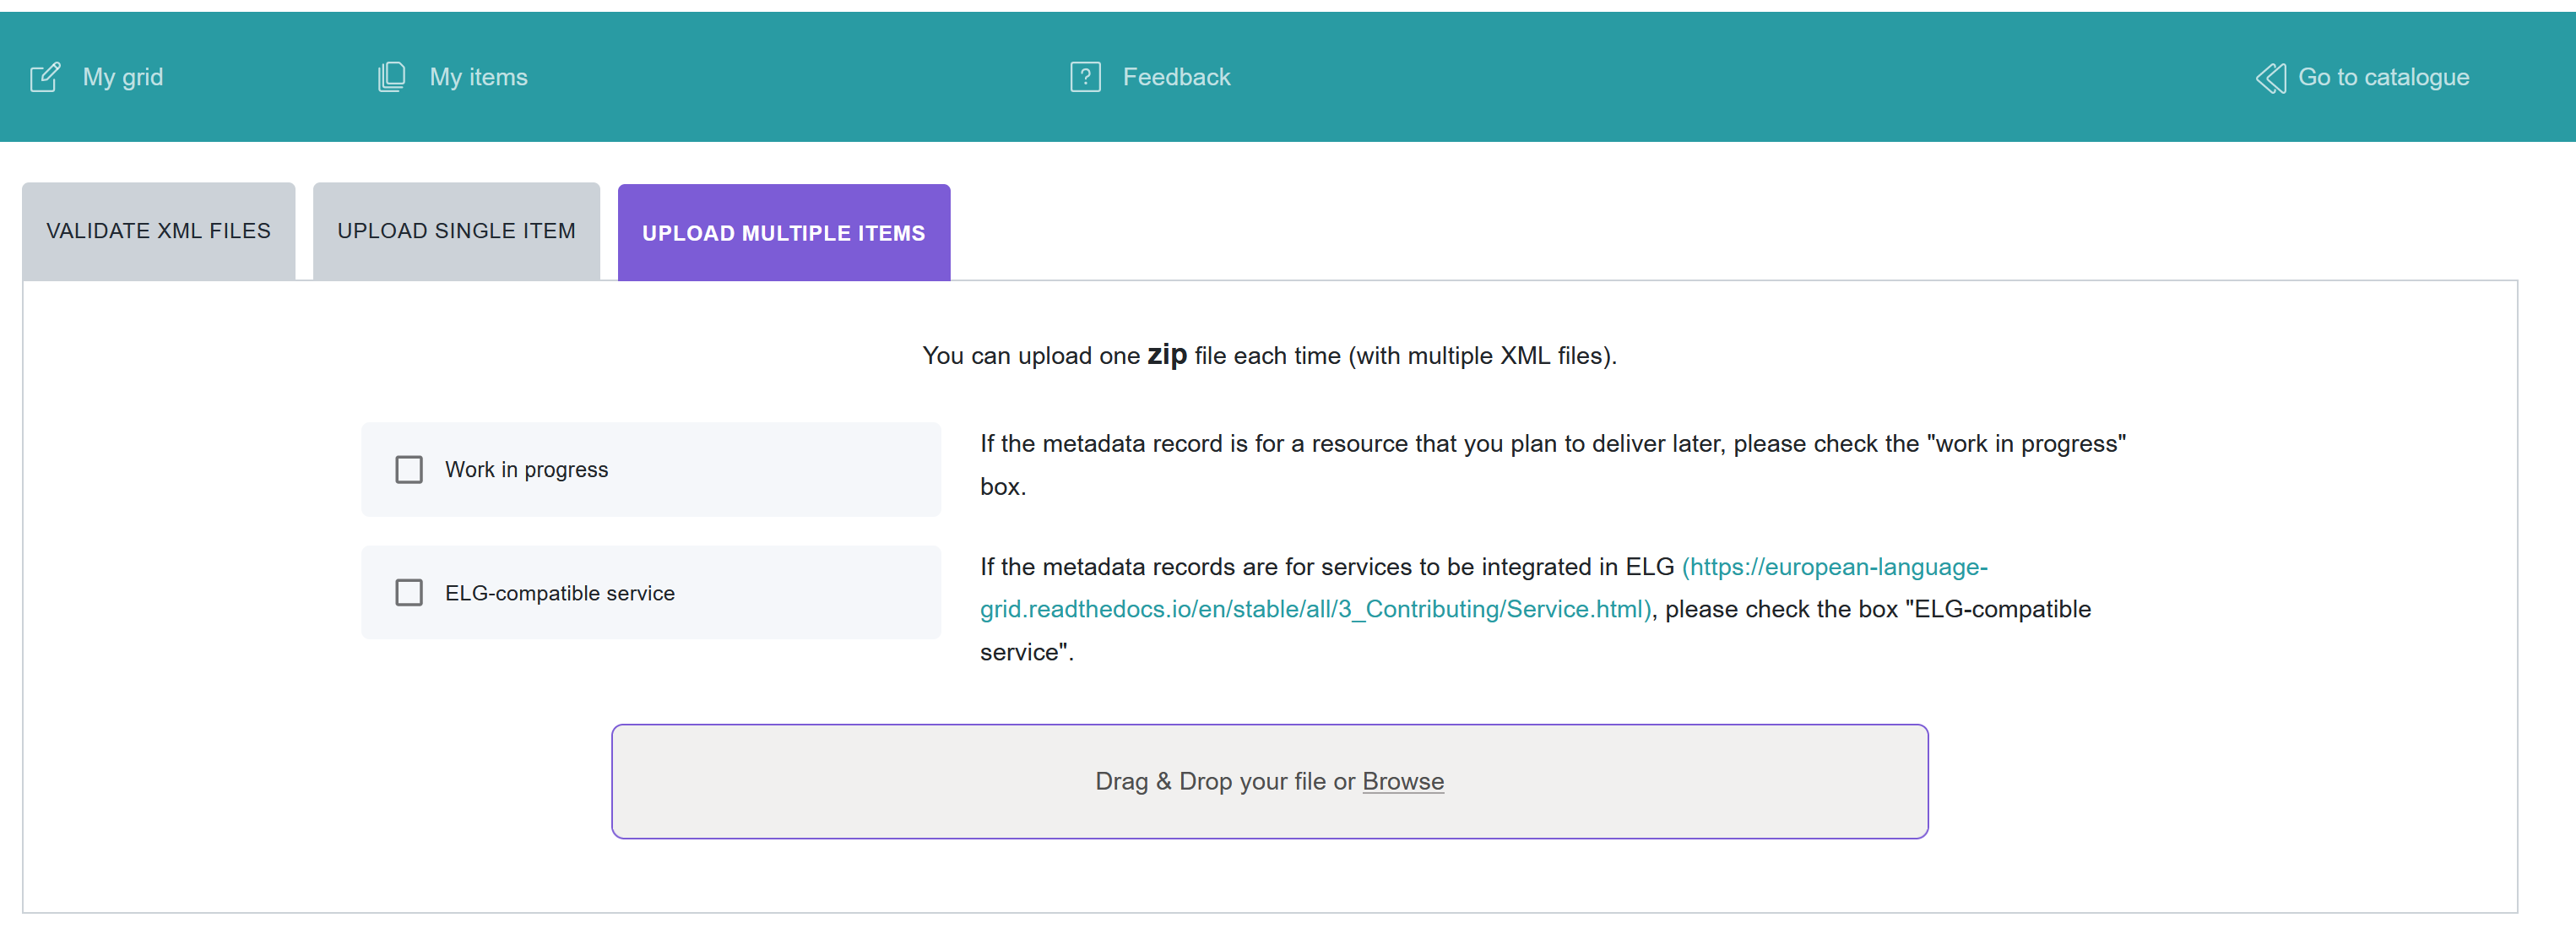
Make sure you tick any of the boxes that appear on this page and fit your case, i.e.
Work in progress: if you are registering an ELG compatible service or a resource that will be hosted at ELG but which you are still preparing 5;
ELG-compatible service: if you are uploading the metadata for an ELG compatible service;
Submit data after XML: if you are uploading a data resource and intend to upload content files with it; you will be prompted to upload the data through the next step.
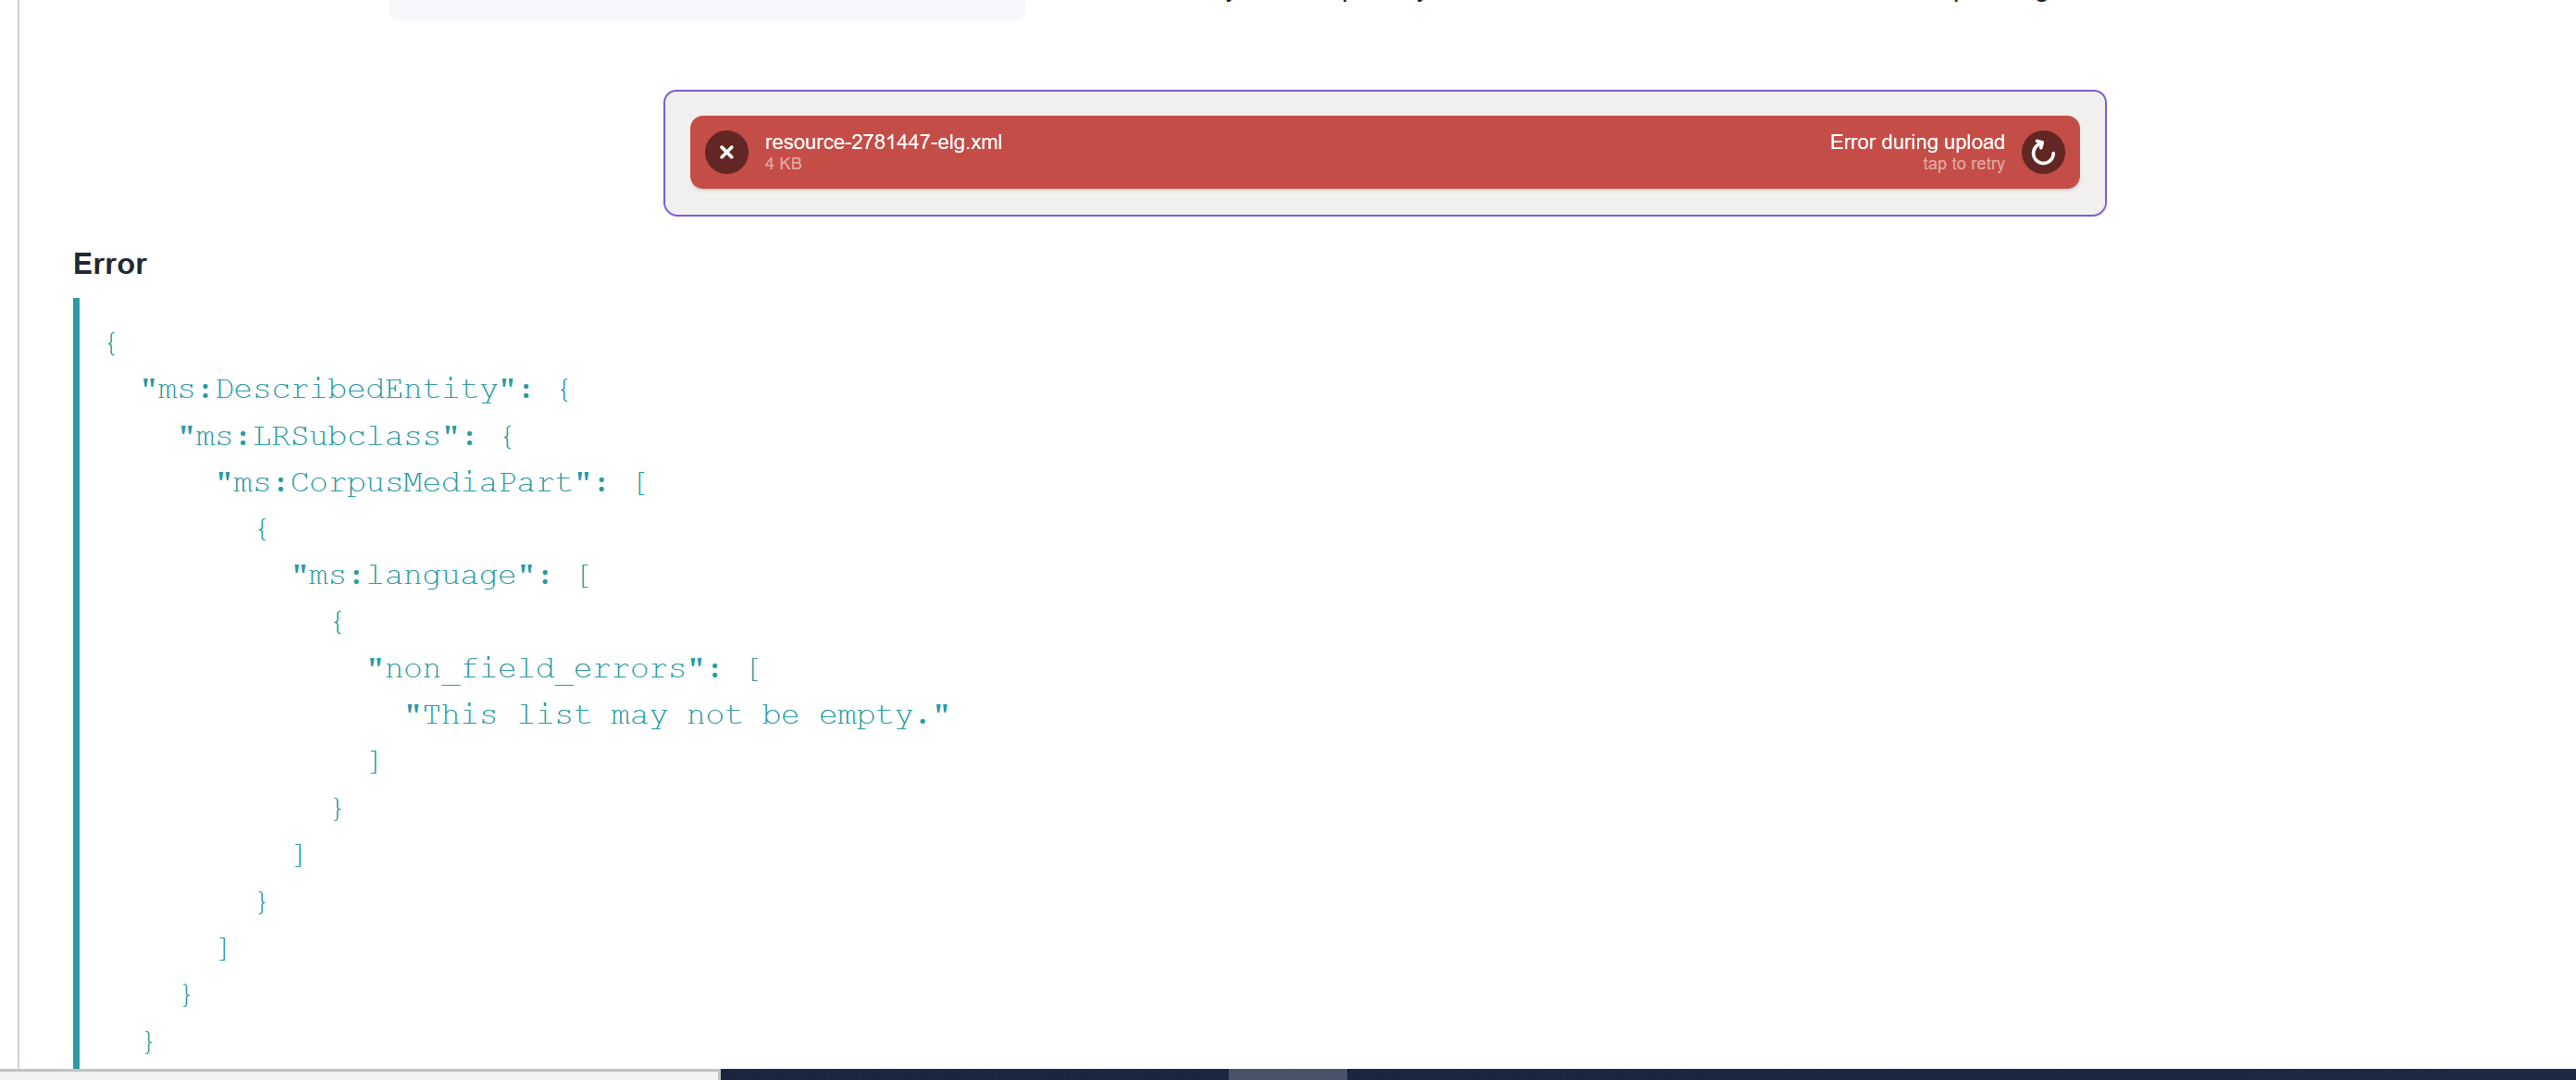
If there are any errors in your XML file 6, these will be shown to you. Fix them and try the upload again.
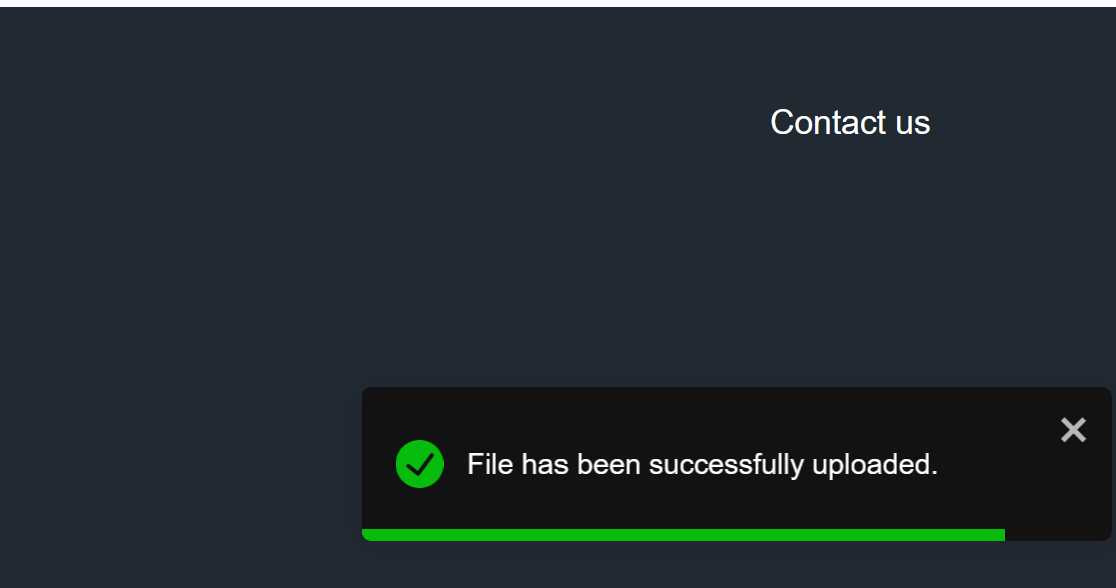
Eventually, a success message will be shown to you and the metadata will be imported into the database.
You will then be transferred to the view page of the record, where you can edit and submit it for publication (see Manage your items).
Upload batch files
By following the same process, you can upload mulitple metadata files zipped together in a file (with extension .zip) 7.
You will receive an email when the upload has finished with a report on the files that were successfully uploaded and the errors, if any, of failed records. You can then go to the My items page to view, edit and submit for publication the uploaded metadata records (see Manage your items).
Upload, Delete and Replace content files
You can upload content files when you first create a record using the interactive editor 8.
If you skip the step or if you create an item by uploading a metadata file and decide to upload your content files at a later time, simply visit the editor and select the Data section where the upload button is found.
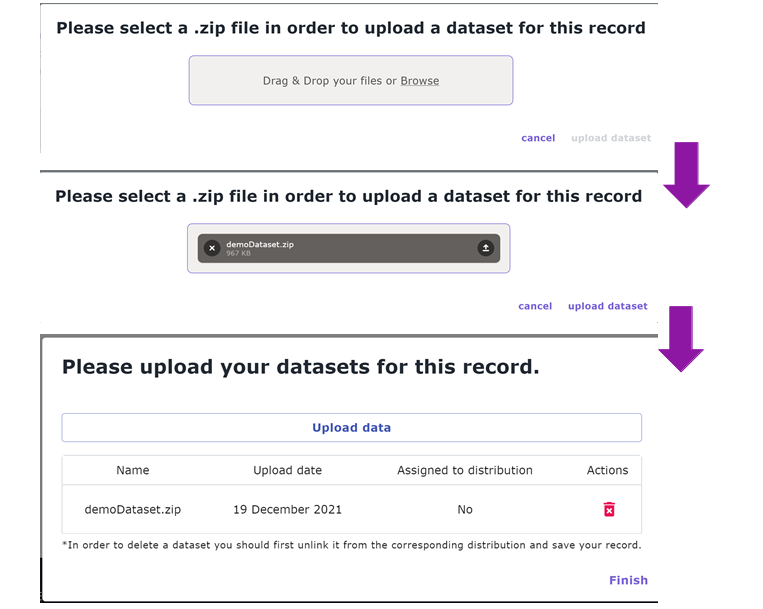
A series of screens (as shown in the image below) will be presented to guide you through:
select the dataset,
upload it,
see the details of your upload when it is completed, and
click on the finish button to go back to the editor.
When the upload has been successfully finished, you will be notified by a message.
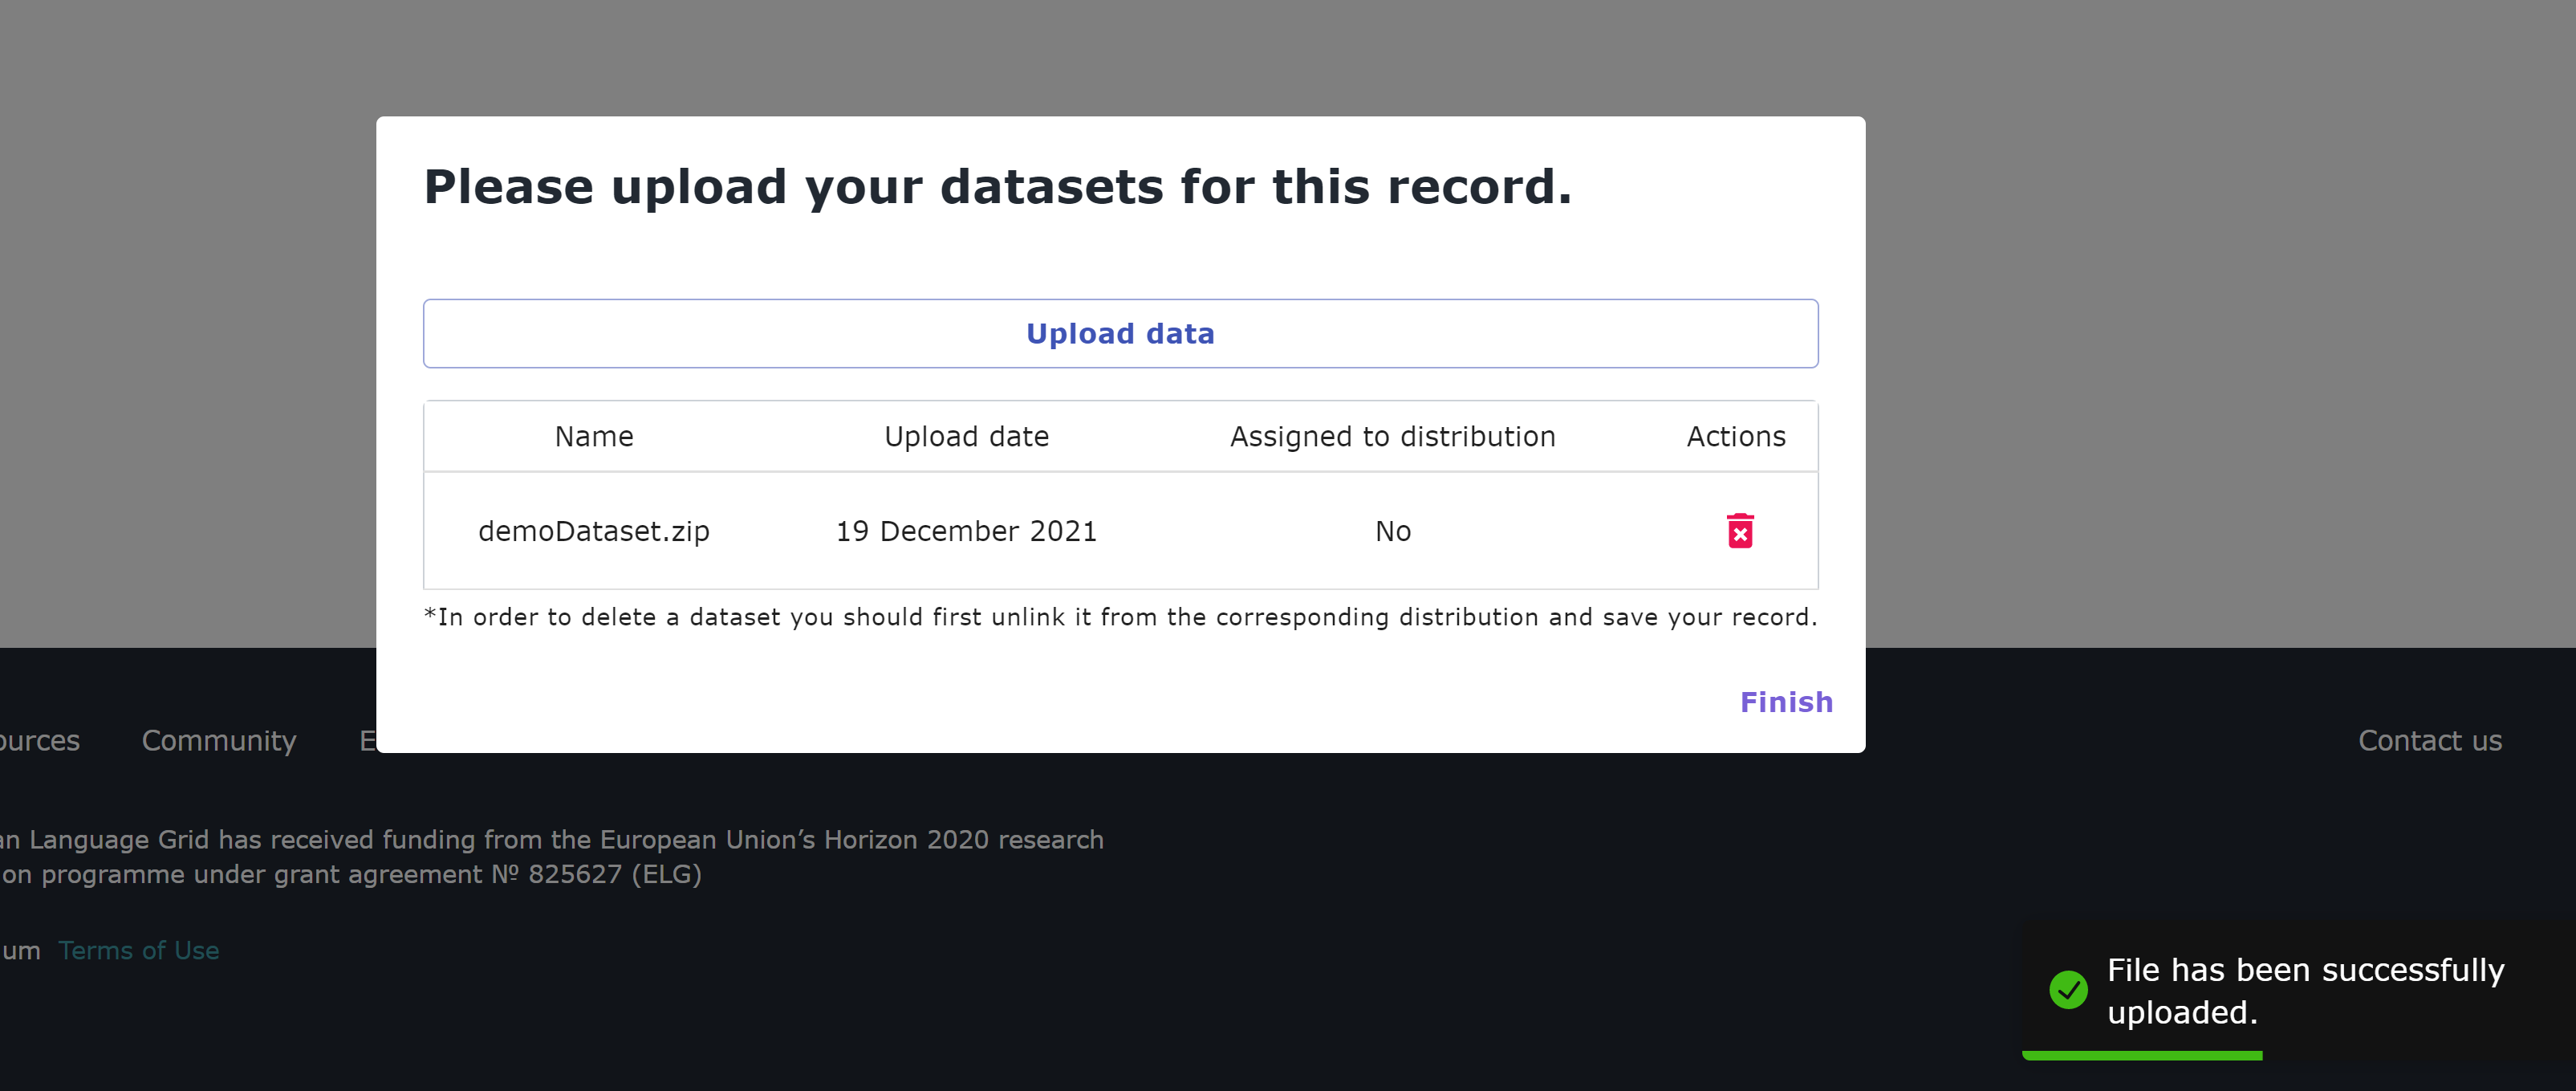
You can upload more datasets, if you want, following the same procedure.
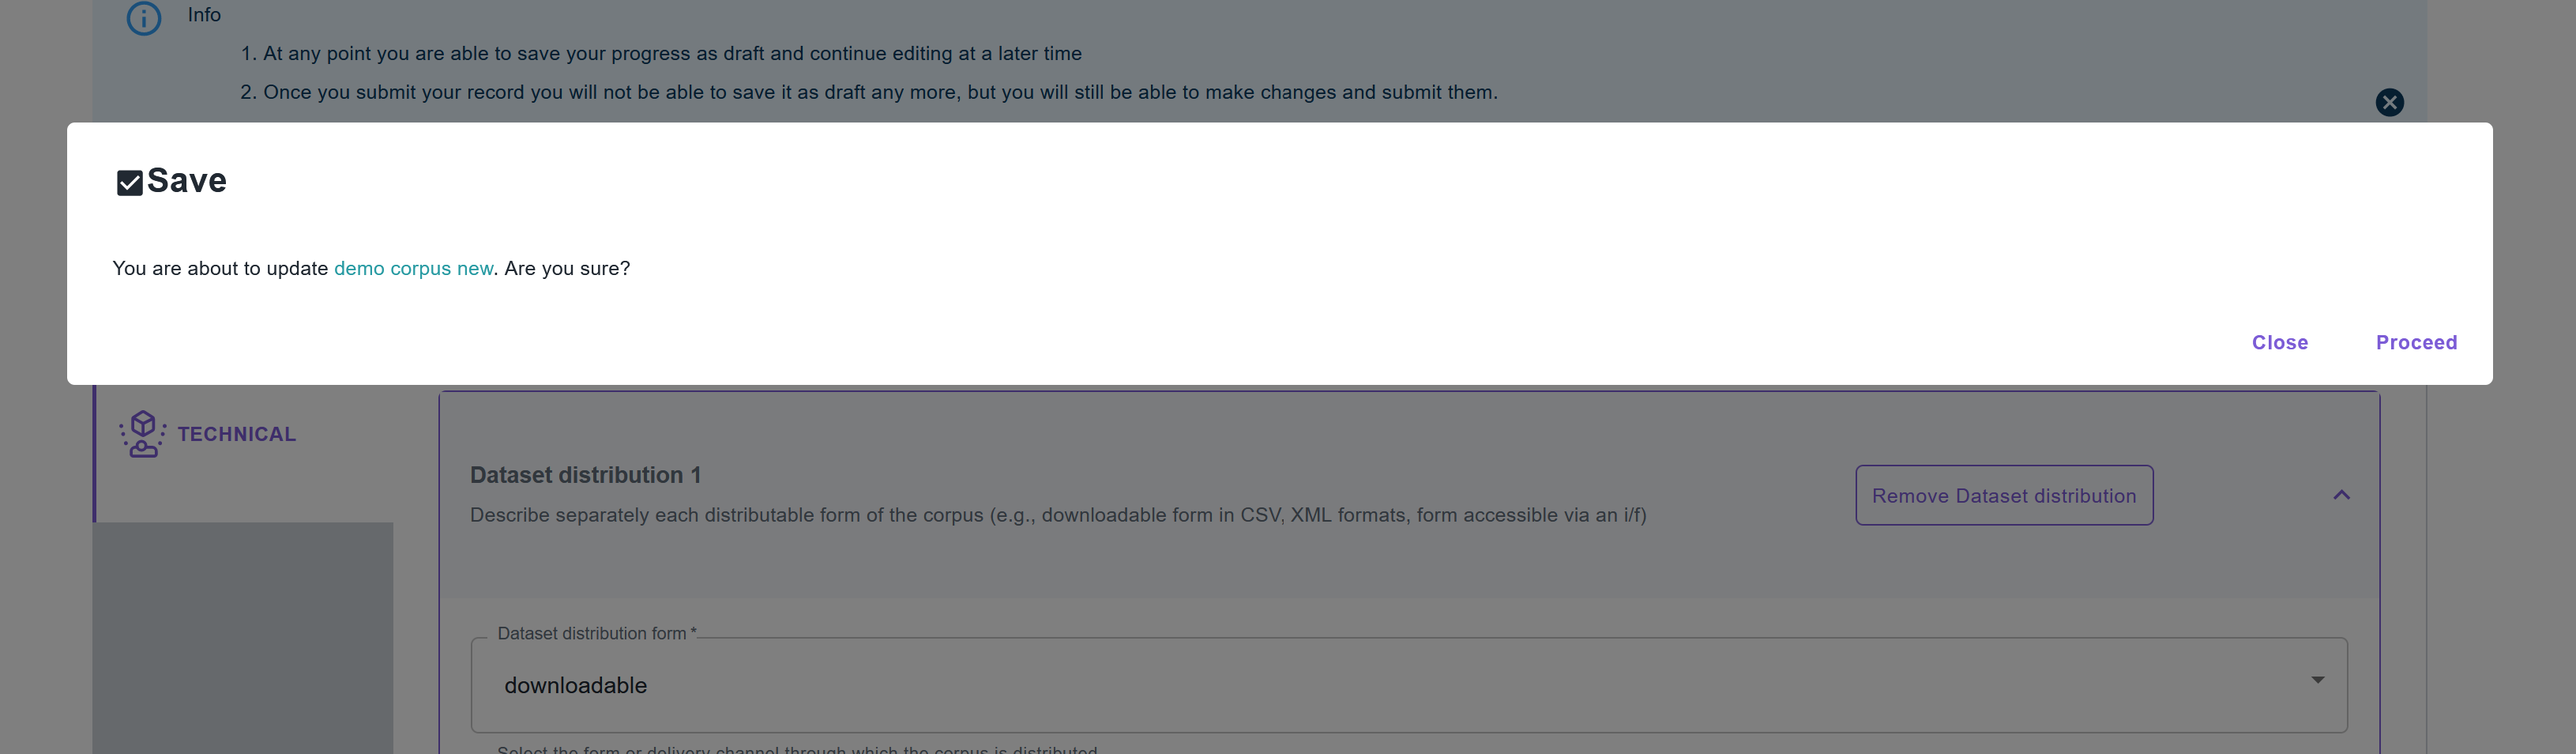
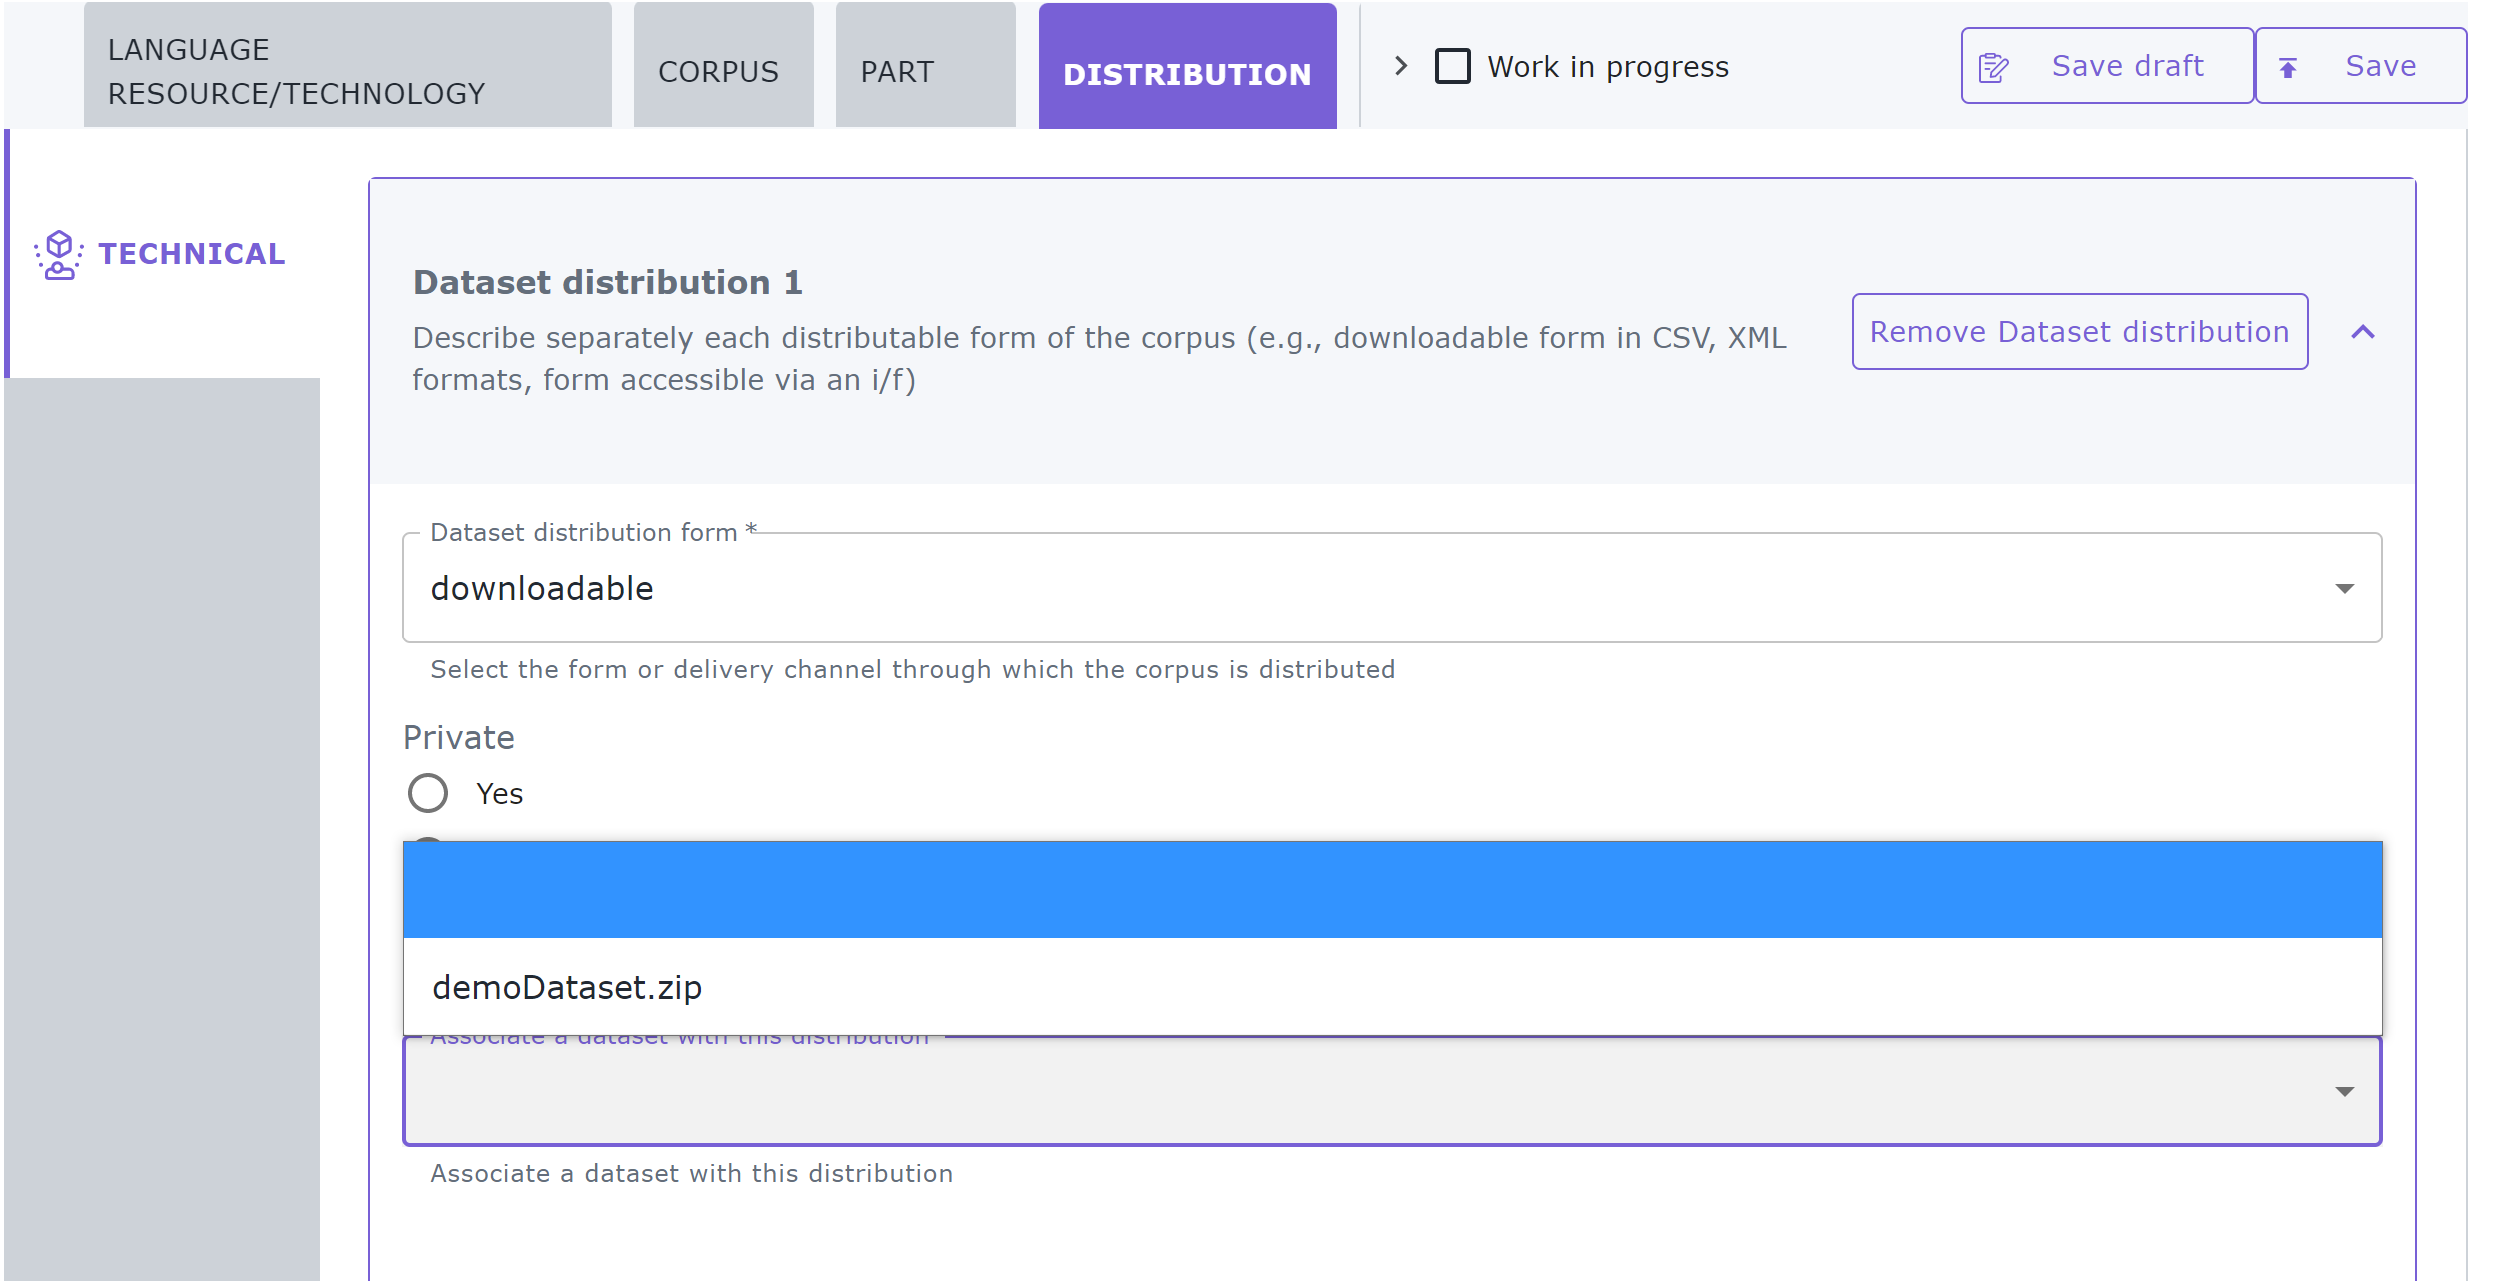
For the upload to be completed you must associate the dataset with a distribution. To do so, go to the Distribution section. When the distribution form is set to downloadable, there is a metadata field below where you can create the link as shown in the image below. Click on the arrow in the field box and you will be presented with a dropdown list of two options: the by default empty value and the name of the dataset you have previously uploaded. Choose the latter and click on save.
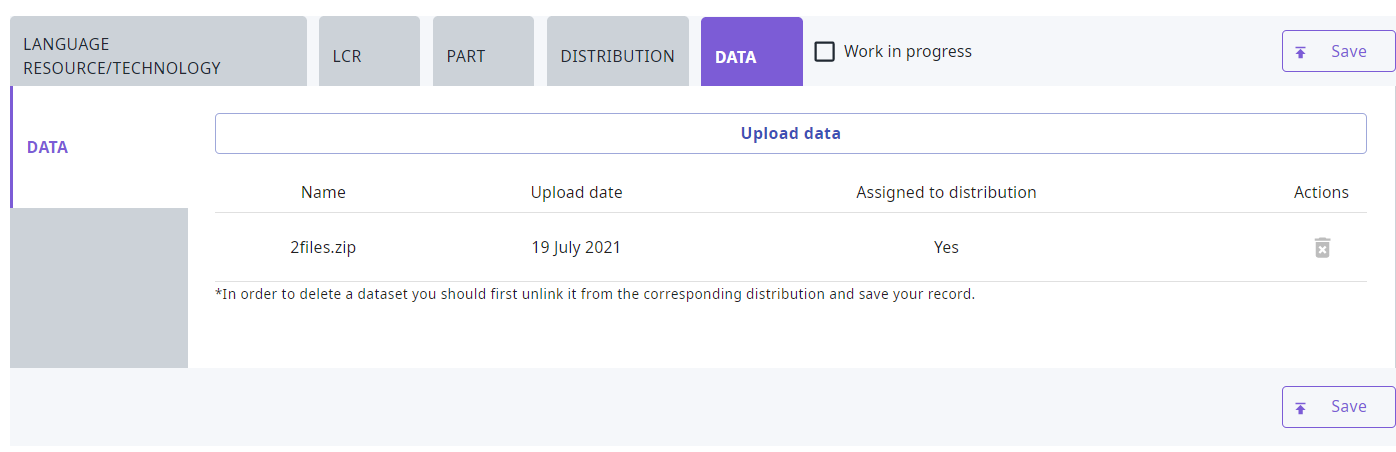
The next time you’ll edit the metadata record, you’ ll see that the dataset is associated with the distribution and the delete icon is deactivated.
You will not be able to submit a record for publication, unless all uploaded datasets are assigned to their respective distributions. Upon submitting a record, you will be notified and transferred to the editor.
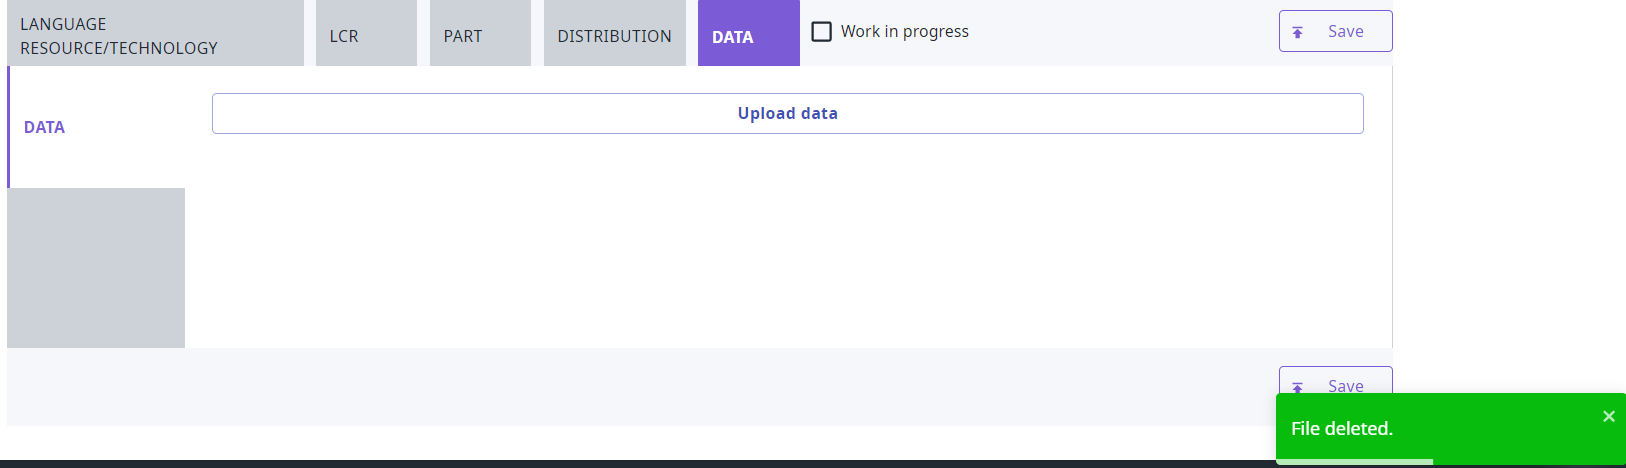
If you need to delete a dataset, you must first unlink it from the corresponding distribution (by choosing the empty option in the dropdown list) and save your changes. Then select to edit the metadata record once more. Go to the Data tab and you’ll find the delete icon activated again. If you click on it you will receive a notification that the files have been successfully deleted. All information as regards the dataset is removed from the respective section.
Note
For the time being, if you need to replace a dataset you have to follow the procedure described above (unlink the existing dataset, delete it, upload a new one and associate it again with a distribution).
- 1
For organizations, before entering the name, you will be asked whether it is an organization or division of an organization.
- 2
If the files are available in multiple formats, (e.g. in XML, TXT and PDF formats), you are advised to package them in different compressed files by data format.
- 3
You can even save as draft a record with only the resource name.
- 4
If you want to validate a batch of XML files, zip them together in one file without any subfolders.
- 5
If you are still preparing a resource, you may not know yet some metadata (e.g. size of the resource, licence). If you tick the work in progress box, when the item is published on the ELG catalogue, the Download tab will not be visible. When the resource is ready, please contact us and we will return the record to the editing status, so that you can proceed with the final submission.
- 6
During the upload process, additional validation rules are triggered for elements marked as mandatory upon conditions, i.e. elements that become required due to the values of another element. So, even if you are uploading valid XML files, you may still get some error messages.
- 7
As with validating, to upload a batch of XML files, you must zip them together in one file without any subfolders.
- 8
Upload of content files is available for corpora, lexical/conceptual resources, models and grammars. For tools and services that do not adhere to ELG specifications (non ELG compatible services), the upload of content files is available only after the metadata record has been created.